DriveFlow CRM User Manual
Documentation version 1.0 - last updated 2026-11-18
This manual is for the people who use DriveFlow every day at a driving school: owners, administrators, managers, receptionists, finance staff and instructors. It follows the order in which a school meets each task, from signing in to registering a student, booking and completing lessons, driving tests, invoices and payments.
It describes the staff web application as it works today, including the things that are missing or do not work as the screen suggests. Setting the school up (branches, users, packages, settings, subscription) is covered in the Administrator Guide. Each chapter links to the detailed section page for the full rules and every message.
Table of contents
Contents
- Signing in and finding your way around
- Registering a student
- The student profile
- Training packages and courses
- Scheduling a lesson
- The calendar
- Rescheduling and cancelling
- Attendance completion and sign-off
- Lesson requests from students
- Driving tests
- Quotes invoices payments and balances
- Leads and follow-ups
- Instructors and vehicles day to day
- Fleet and instructor earnings
- Reports and dashboard
- Notifications students and staff receive
- The student portal and the mobile app in brief
- Known limitations
1. Signing in and finding your way around
Sign in
- Open the DriveFlow address in your browser. The sign-in page (Welcome back) opens.
- Enter your Email and Password.
- Tick Remember me only on your own device.
- Click SIGN IN.
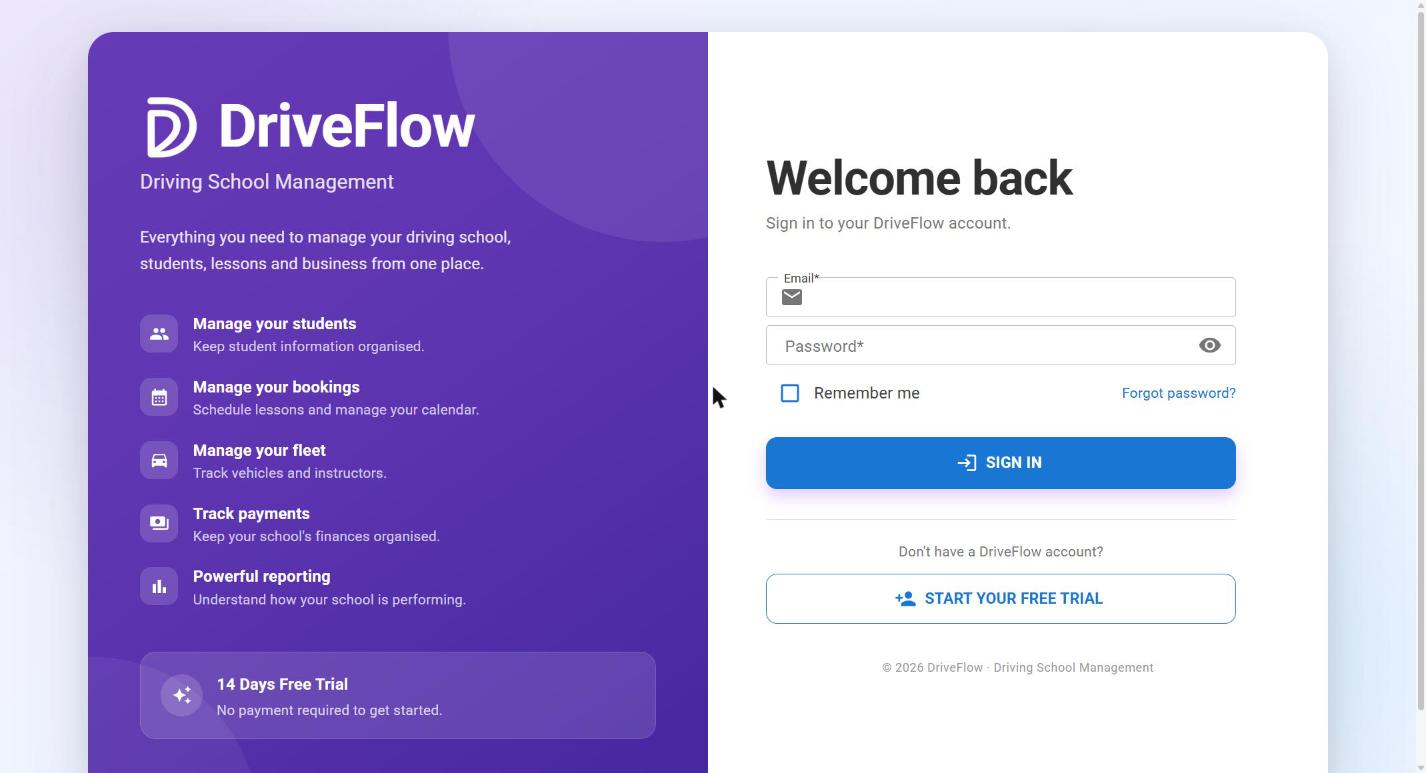
Staff land on the Dashboard. Students land on the student portal. If you signed in with a temporary password that was emailed to you, the Change Password page opens with the note "You signed in with a temporary password. Choose your own password to continue." Nothing else opens until you have chosen your own password.
Password rules
At least 8 characters, with an upper-case letter, a lower-case letter, a number and a symbol.
| What you see | What it means |
|---|---|
| Invalid email or password. | The email is not registered, the password is wrong, or the account has been disabled. The same message is used for all three. |
| Too many failed sign-in attempts. Please try again in N minutes. | After 5 wrong passwords in a row the account is locked for 5 minutes. Wait, or reset the password with Forgot password?. No administrator can unlock it by hand. |
| You were signed out because you weren't active for a while. Please sign in again. | 30 minutes without activity (not when Remember me is ticked). |
| Your session has ended. Please sign in again. | Your sign-in ran out, or an administrator changed your role, branch or permissions, or sent you a new password. |
A normal sign-in lasts 8 hours and is not extended while you work. With Remember me it lasts 30 days. These are the default values.
Forgot your password
- On the sign-in page click Forgot password?
- Enter your Email and click Send reset link.
- Open the email, click the link, enter New Password and Confirm New Password, and click Reset password.
Note
The link works once and for one hour. The page shows the same confirmation whether or not the address has an account, so if no email arrives the address may be wrong, the account may be disabled, or more than 3 requests were made in 15 minutes. If you cannot use the link, ask an administrator to send you a new password.
To change your password while signed in: click your name at the top right, then Change Password. To sign out: click your name, then Logout.
Full detail: Login and authentication.
The screen
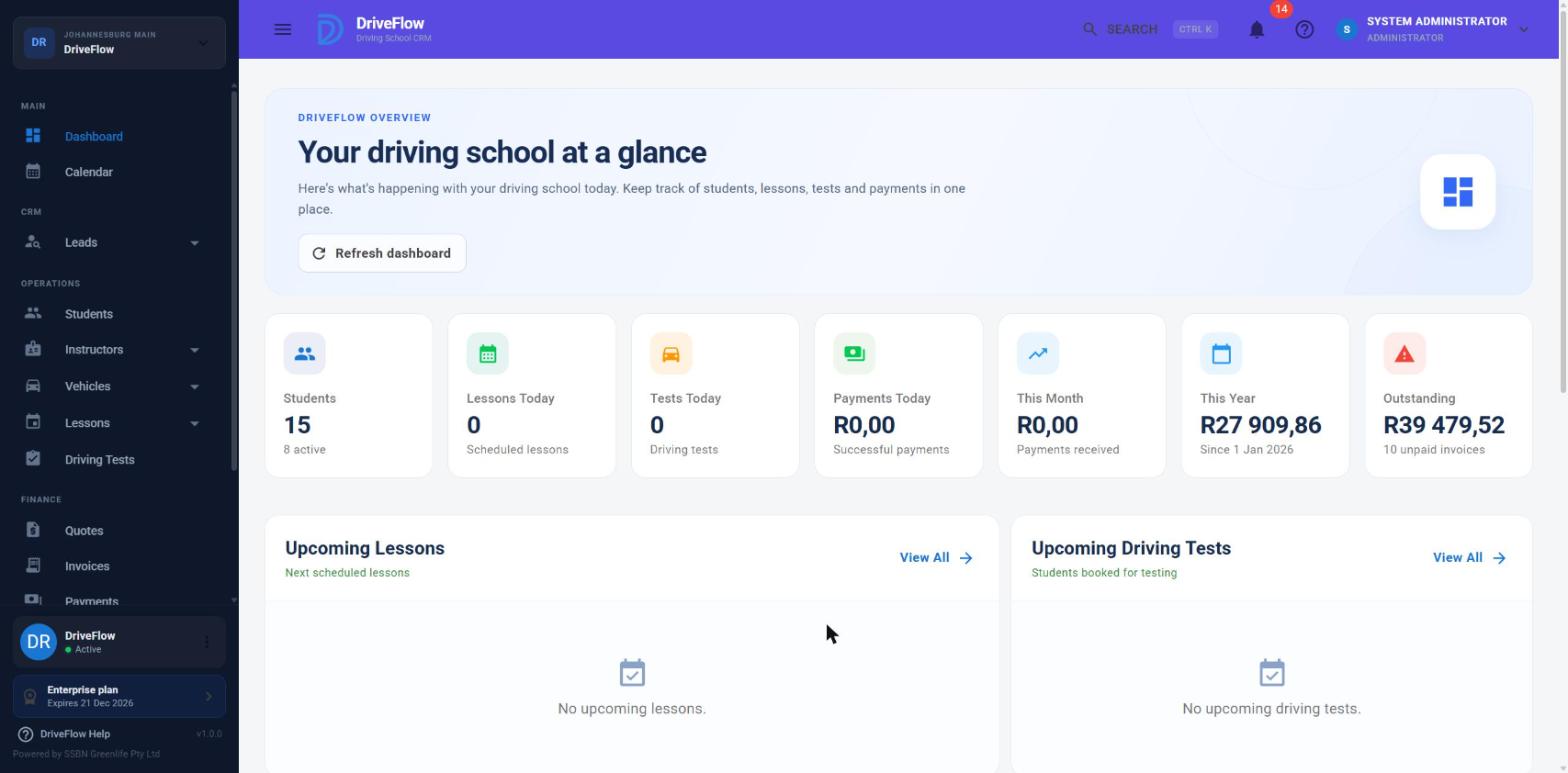
The screen has three areas: the header across the top, the menu on the left and the page in the middle.
| Header item | Use |
|---|---|
| Menu button (three lines) | Opens or closes the left menu. |
| Search (Ctrl K) | Type at least 2 characters to find students, instructors, vehicles, invoices, quotes, leads, lessons and tests. Enter opens the first result. |
| Bell | Notifications: work that needs attention (see chapter 16). |
| Question mark | Help Centre, Keyboard shortcuts, About DriveFlow. |
| Your name and role | My Profile, Change Password, Settings (only with the View Settings permission), Logout. |
The left menu shows only what your role and your school's plan allow.
| Section | Items |
|---|---|
| MAIN | Dashboard, Calendar |
| CRM | Leads (All Leads, Follow-ups, Campaigns) |
| OPERATIONS | Students; Instructors (Instructors, Reviews, Earnings); Vehicles (and Fleet Management); Lessons (Lessons, Lesson requests); Driving Tests |
| FINANCE | Quotes, Invoices, Payments |
| REPORTING | Reports |
| ADMINISTRATION | Settings |
With the default roles, a Receptionist has no Reports or Settings; an Instructor has no Leads, Finance, Reports or Settings; Finance has no Calendar or Leads; a Viewer can open lists and reports but cannot change anything.
Permissions
Seeing a menu item does not mean you can change things on the page: buttons such as Add, Edit and Delete have their own permissions.
Things to know:
- There is no branch switcher. The branch name at the top of the menu is a label. If your user is tied to one branch you see only that branch's students, instructors, vehicles, lessons, invoices and payments. The arrow beside the school name does nothing.
- Rows in lists have a three-dot menu (⋮) with the actions you are allowed to use.
- Messages appear at the corner of the screen: green for success, orange for a warning, red for an error.
- You don't have access to this page means your role may not open it. Ask an administrator.
- When the school's subscription has ended, the menu shrinks to Renew Subscription and My Profile and every other page is closed until the owner renews.
Full detail: User interface overview, Roles and permissions.
2. Registering a student
Who: roles with the Create Students permission (by default Owner, Administrator, Manager and Receptionist).
Before you start
The school needs at least one training package and one licence code switched on, and the plan must have room for another student. A student cannot be registered without a training package.
How the page works
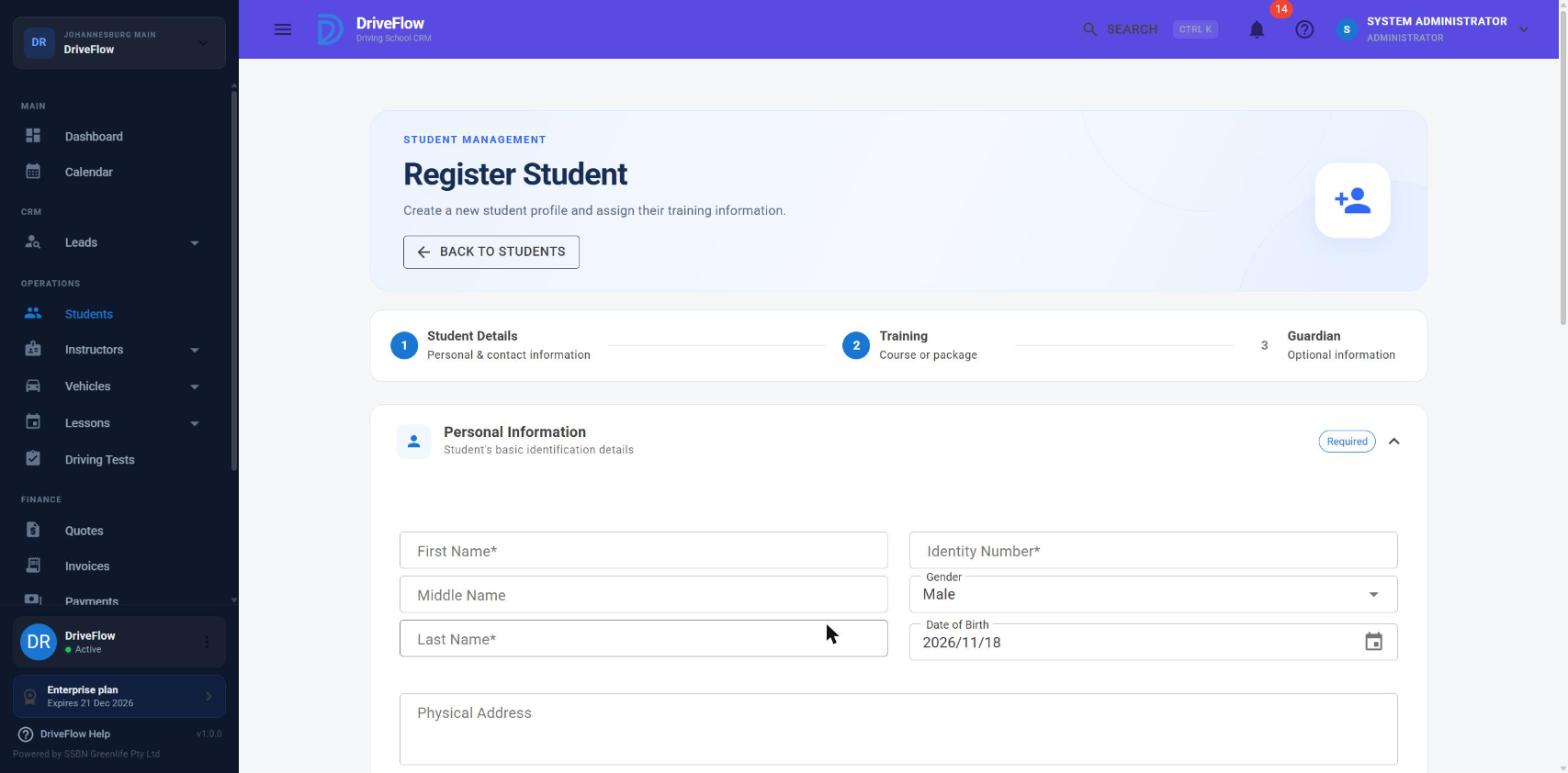
Registration is one page with four panels, not a step-by-step wizard. The numbered strip at the top (1 Student Details, 2 Training, 3 Guardian) is decorative: it does not change and cannot be clicked. There is no review step and one save button at the bottom.
Steps
-
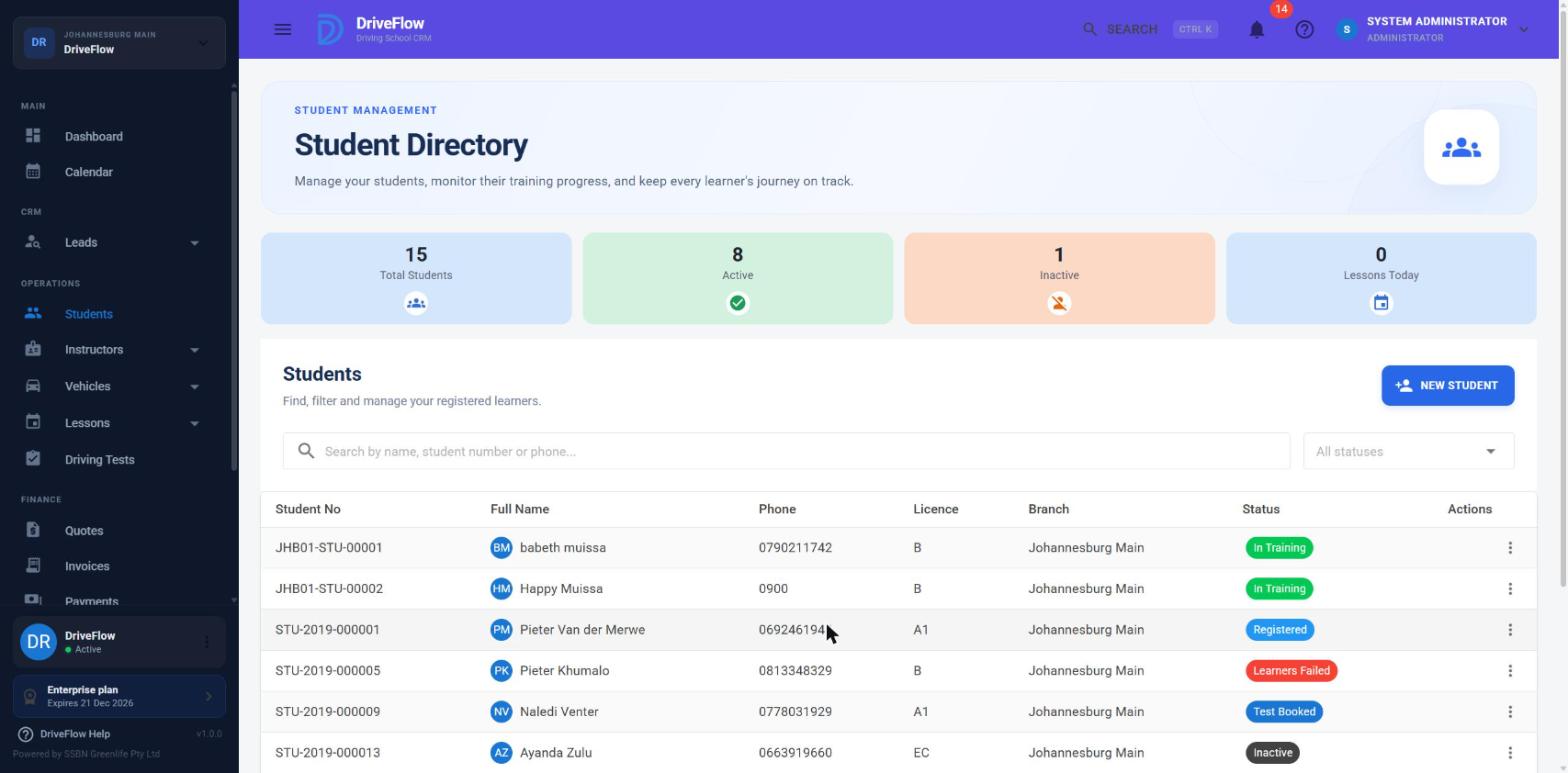
In the left menu click Students. The Student Directory opens.
The Student Directory. -
Click New Student. The Register Student page opens.
- Fill in Personal Information:
- First Name and Last Name (required), Middle Name (optional).
- Identity Number (required): exactly 13 characters, and not already used by another student of your school. For a South African school, typing the 13 digits fills in the Date of Birth.
- Gender: Male or Female.
- Date of Birth: it starts on today's date, so change it. The student must be older than 16, which in practice means they have turned 17.
- Physical Address (optional).
- Tick Has Learners Licence if the student has one, then enter the Learners Licence Number and Learners Licence Expiry. Enter the expiry date: without it the student starts as Registered instead of Learners Passed.
- Has PDP, PDP Number, PDP Expiry are stored for your records only.
- Fill in Contact Information: Mobile Number and Email (both required), Alternative Number (optional). The email is used for the welcome message, invoices and the student portal invitation.
- Fill in Training Information:
- Branch. Staff tied to one branch can only choose their own.
- Licence Code. Choose this first; the package list depends on it.
- Training Package. A box shows Lessons, Price and Valid for N days.
- Instructor (Optional). Leave on "-- Not Assigned --" if not known.
- If needed, click the Guardian Information heading to open it and fill in what you have. Tick Use as Emergency Contact to also save the guardian as the emergency contact. Nothing in this panel is compulsory, even for a student under 18.
- Click Register Student.
If a required field is empty you see "Please complete all required fields." and nothing is saved. On success you see "Student registered successfully." and the student's profile opens.
What one registration creates
flowchart TD
    A["Students > New Student"] --> B["Fill in the four panels on one page"]
    B --> C["Click Register Student"]
    C --> D{"Checks pass? Plan limit, 13-character ID, age, branch, package, ID and email not already used"}
    D -- No --> E["Red message. Nothing is saved"]
    D -- Yes --> F["Student with a student number"]
    F --> G["Guardian record"]
    F --> H["Course - status Active, started today"]
    F --> I["Invoice - status Pending, due in 15 days"]
    I --> J["Welcome message and first invoice emailed, if the school's notification settings allow"]
J --> K["Student profile opens"]| Created | Detail |
|---|---|
| Student | With a student number such as JHB01-STU-00042 (branch code, STU, running number). |
| Course | The chosen package and licence code, status Active, start date today. |
| Invoice | One line for the full package price, status Pending, due 15 days later. |
| Messages | The welcome message and the first invoice by email. A failed email never cancels the registration. |
Note
Registration does not create a portal sign-in (invite the student afterwards, see chapter 17) and does not book any lessons.
Starting status: Learners Passed when Has Learners Licence is ticked and the expiry date is today or later; otherwise Registered.
Example
Thandi Mokoena wants a Code B licence and has a learner's licence that expires on 14 March 2027. Reception clicks Students > New Student, enters her names and 13-digit identity number (the date of birth fills in), chooses Female, ticks Has Learners Licence and enters the number and expiry, enters her mobile number and email, chooses the branch, Code B and "Code B - 10 Driving Lessons", leaves the guardian panel closed and clicks Register Student. Thandi gets a student number, status Learners Passed, an Active course of 10 lessons and a Pending invoice due in 15 days.
Common messages
| Message | What to do |
|---|---|
| Student must be older than 16 years. | Correct the date of birth (it also appears if the date was left on today). |
| Identity Number already exists. / Email address already exists. | Another student of your school has it, including a deleted student. Search the Student Directory. |
| You can only place students at your own branch. | Choose your own branch. |
| The assigned instructor works at a different branch from the student. Choose an instructor from the student's branch. | Choose an instructor from that branch or leave unassigned. |
| Licence Code is required for this training package. | Choose a licence code. |
| The server took too long to respond. Please try again. | Check the Student Directory before retrying, in case the student was saved. |
Full detail: Student registration, Guardians and emergency contacts.
3. The student profile
Finding a student
Open Students. The cards show Total Students, Active, Inactive and Lessons Today. Type in the search box and use the All statuses filter.
The search matches the student number, first name, last name, identity number and email.
Search limits
It does not match phone numbers, although the box says so, and searching a full name such as "Thandi Mokoena" finds nothing: search "Thandi" or "Mokoena".
Click a row to open the profile.
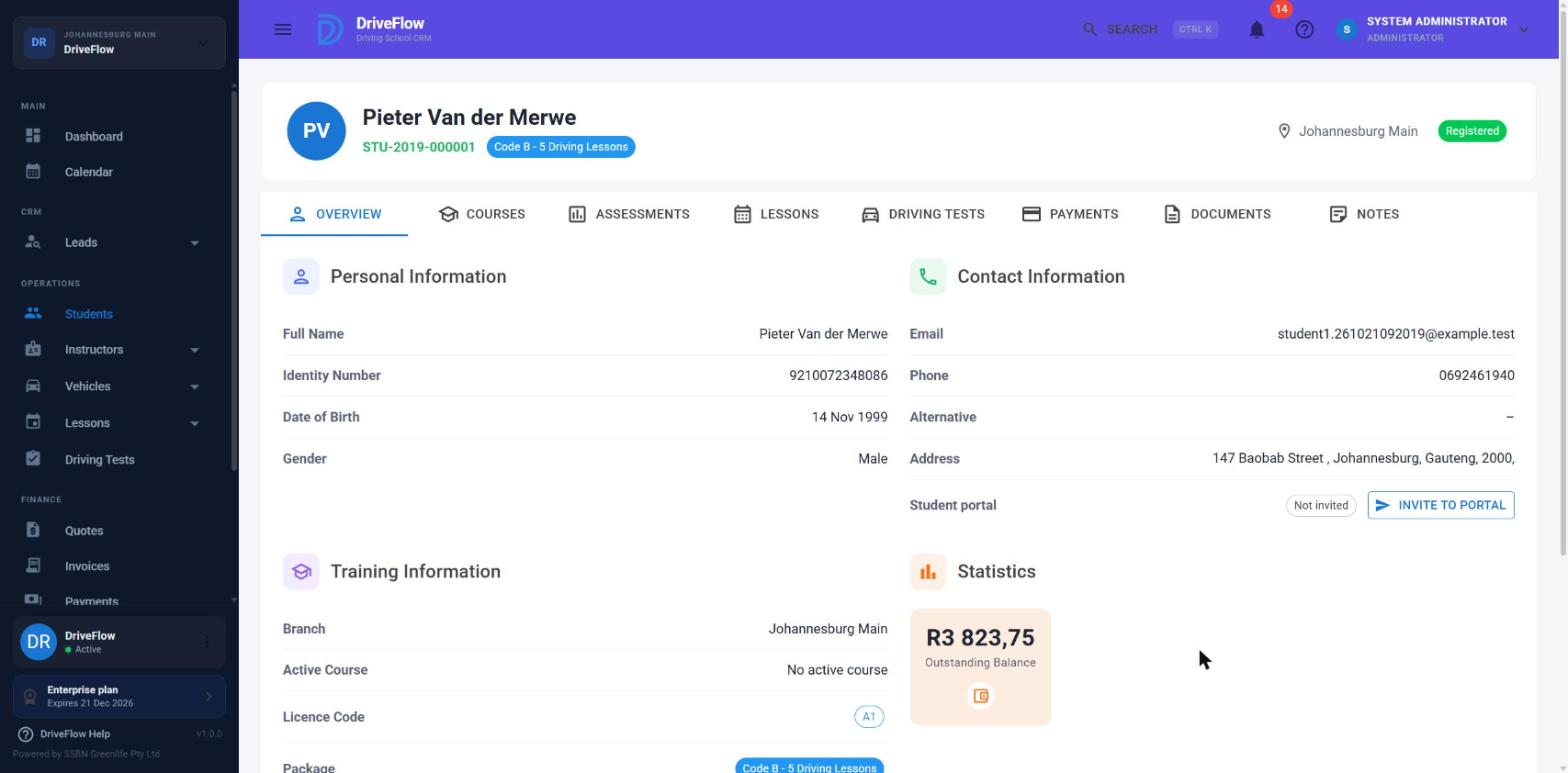
Tabs
| Tab | What it holds |
|---|---|
| Overview | Active course with lesson progress, personal and contact information, the Student portal row, training information and balance. |
| Courses | The active course and the course history. |
| Assessments | Driving assessments, with Record Assessment. |
| Lessons | The lesson table, the cards Purchased, Completed, Remaining, Next Lesson, and the buttons Complete Training, Add Extra Lesson, Schedule Lesson. |
| Driving Tests | The student's tests and a button to book one. |
| Payments | Cards Outstanding, Total Invoiced, Total Paid, Last Payment, and the payments table. |
| Documents | Uploaded documents. |
| Notes | Free-text notes with Add Note. |
Which tabs you see depends on your permissions. Below the tabs are a back arrow, Calendar (the Student Calendar) and the three-dot actions menu.
The actions menu
View, Edit, License Student, Start New Course, Complete Active Course, Record Assessment, Schedule Lesson, Book Driving Test, Upload Document, Record Payment, Deactivate Student / Activate Student, Delete Student. Items are hidden when you lack the permission or the status does not fit (for example License Student only appears for Test Passed or Learners Passed).
Editing a student
- Open the actions menu and click Edit. The Update Student page opens.
- Change the fields and click Update Student. You see "Student updated successfully."
What is saved: names, identity number, gender, date of birth, learner's licence and PDP details, mobile number, alternative number and email.
Not saved
What is not saved, although the page lets you type it: the Physical Address and everything in Guardian Information. Branch, licence code, training package and assigned instructor cannot be changed on this page at all.
When a save is refused the page only shows "Unable to update student." The usual reasons are that the student is Inactive (activate first), is Licensed, or the email or identity number belongs to another student.
Warning
Saving an edit for a student who has a valid learner's licence sets the status to Learners Passed, whatever it was. Check the status afterwards; the next lesson booking moves the student back to In Training.
Student status
Staff do not pick a status. It changes as a result of other actions.
| Status | How it is reached |
|---|---|
| Registered | Registration without a valid learner's licence; or Activate Student. |
| Learners Pending | A learner's test is booked for a Registered or Learners Failed student. |
| Learners Passed / Learners Failed | Registration or edit with a valid learner's licence; or a learner's test result. |
| In Training | The first lesson is booked, a lesson request is approved, or a new course is started. |
| Training Completed | The last lesson of the allowance is completed, or Complete Training is clicked. |
| Ready For Test | A driving licence test is booked. |
| Test Passed / Test Failed | A driving licence test result is recorded. |
| Licensed | License Student. |
| Inactive | Deactivate Student. |
Note
On Hold and Test Booked exist in the filter but nothing sets them.
Licensing, deactivating and deleting
- License Student asks for a Graduation Date and optional Graduation Notes. It is refused while the student has an outstanding balance. A Licensed student cannot be edited, booked or paid against, and there is no undo. Licensing does not complete the student's course, despite the wording in the box; complete the course first.
- Deactivate Student is refused for students who are In Training or Ready For Test. Existing lessons are not cancelled, and the portal sign-in is not switched off. Activate Student always returns the student as Registered.
- Delete Student hides the record; it cannot be restored and the identity number and email stay reserved. When deleting from the directory a second confirmation appears after the delete has already happened: click Cancel on it. Prefer Deactivate.
Documents and notes
Known defects
- Upload Document: choose a Document Type and one file (PDF, JPG, JPEG, PNG, DOC or DOCX, up to 10 MB). Uploads of type Proof of Payment appear to fail; use Other. The Description is not saved. Documents cannot be uploaded for an Inactive student.
- Notes: Add Note, type, Save Note. The Edit item adds a new note instead of changing the old one, and Delete does nothing.
Full detail: Student profiles, Student status management, Student documents, Student training information.
4. Training packages and courses
A training package is what the school sells: a number of lessons at a price. Packages are set up by an administrator (see the Administrator Guide). When a student is put on a package, DriveFlow creates a course for that student. A student has at most one Active course at a time.
How many lessons a student has left
Every lesson that is not cancelled counts as used: scheduled, confirmed, in progress, awaiting sign-off, completed and no-show. Cancelling a lesson gives it back. A no-show does not.
Warning
"Remaining" does not mean the same on every screen:
| Screen | Remaining means |
|---|---|
| Profile > Overview | Lessons still available to book. Use this figure when deciding whether another lesson can be booked. |
| Profile > Lessons tab and Courses tab | Lessons not yet completed (purchased minus completed). |
Example: 10-lesson package, 4 completed, 1 no-show, 2 booked for next week. Overview shows 3 remaining; the Lessons tab shows 6.
Extra lessons
When the allowance is used up, booking is refused with "Student has no remaining lessons in their training package." Add an extra lesson:
- Open the student's profile > Lessons tab and click Add Extra Lesson.
- Choose Paid - raise an invoice (needs Create Invoices) or Free (complimentary) (needs Manage Lessons; "Only managers can give free lessons.").
- For a paid lesson enter the Lesson fee. For a free lesson enter the Reason.
- Leave Book the lesson now ticked to open the Schedule Lesson box straight afterwards.
- Click Add Extra Lesson.
A paid extra lesson raises an invoice due in 7 days and emails it. The lesson can be booked at once, paid or not. Extra lessons are added one at a time. A free one can be removed with Remove while it is not booked; a paid one is removed by cancelling its invoice.
If lessons end up booked beyond the package, the Lessons tab shows a warning with Bill as extra lesson.
Training completed
- Automatic: when a student who is In Training completes the last lesson of their allowance.
- By hand: profile > Lessons tab > Complete Training (needs Edit Students). The comments typed in the box are not saved.
Tip
A no-show uses a lesson but is not "completed", so a student with a no-show does not complete automatically. Add a free extra lesson for the missed one, or click Complete Training.
After training is completed, a lesson can only be booked against an extra lesson added afterwards ("This student has completed their training. Add an extra lesson, or start a new course, before scheduling another lesson.").
Starting another course
- Open the student's actions menu and click Start New Course.
- If the student has an active course, tick Complete the current course.
- Choose the Licence Code and Training Package, check the Course Preview, and click Start Course.
This creates a new Active course and a Pending invoice for the full package price due in 15 days, sets the student to In Training and restarts the lesson allowance.
Important
The invoice is not emailed automatically: send it from the Invoices page. Unused lessons of the old course are not carried over, and lessons already booked stay on the old course.
A package can also be sold in advance on an invoice line with Add as new course from this package ticked. That creates a Purchased course, which is started later with Start New Course and raises no second invoice.
To finish a course without starting another: Courses tab > Complete Course, set the Completion Date, confirm. Nothing is checked (lessons, balance or test) and the student's status does not change.
Warning
There is no way to cancel or reopen a course, and no screen to swap the package of a course that is under way.
Full detail: Courses, Package allocation, Student enrolment.
5. Scheduling a lesson
Who: roles with Create Lessons (by default Owner, Administrator, Manager, Receptionist and Instructor). An instructor who does not manage lessons can only schedule their own.
Steps
-
Go to Lessons > Lessons and click Schedule Lesson. (You can also click an empty slot on the Calendar, or use Schedule Lesson on the student's Lessons tab.)
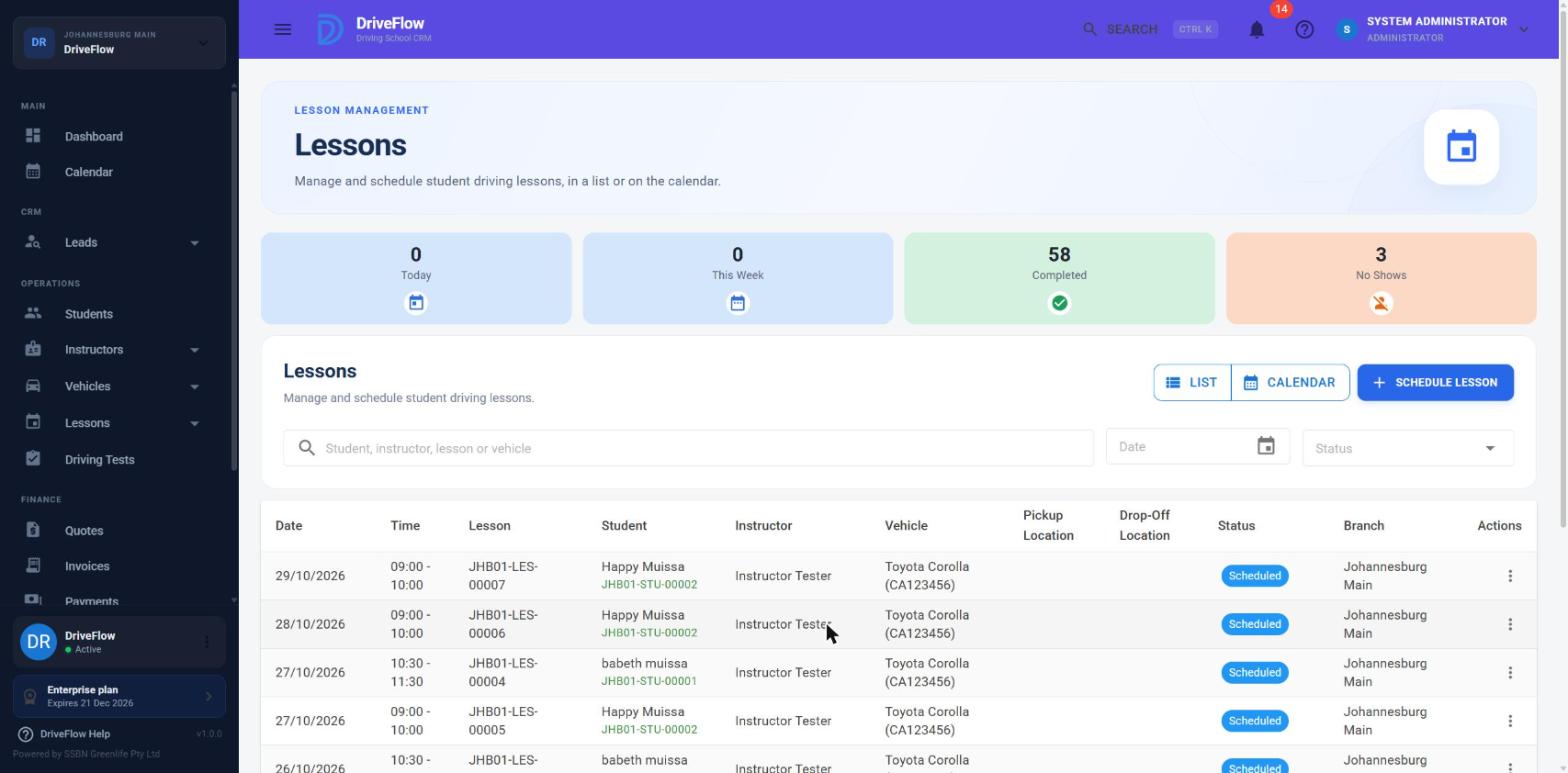
The Lessons page. -
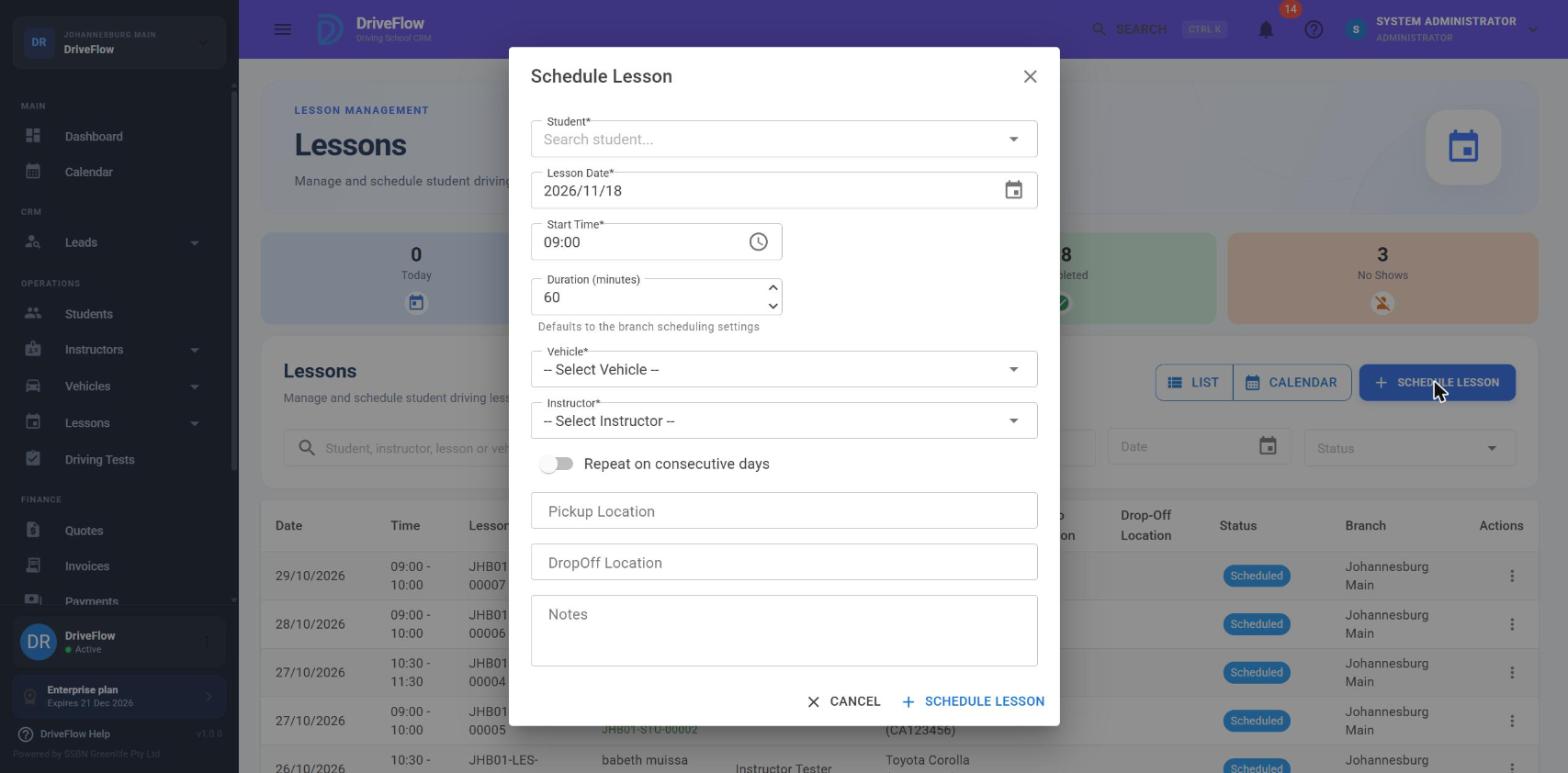
Student: type part of the name and pick the student. The branch, licence code and package are taken from the student; there are no fields for them.
- Lesson Date: defaults to today.
- Under Available start times, click one of the time buttons. These are the times the system will accept for this student on this date. Why N other time(s) are unavailable lists the reason for each rejected time.
- Duration (minutes): defaults to the package's lesson length. You may change it between 30 and 240 minutes in steps of 15.
- Vehicle: choose a vehicle.
- Instructor: choose an instructor.
- Optionally fill in Pickup Location, DropOff Location and Notes. The pickup location is included in the messages to the student and instructor.
- Click Schedule Lesson.
On success you see "Lesson scheduled successfully." The lesson gets a lesson number and the status Scheduled, the student receives a lesson booked message and the instructor a lesson assigned message. A student who was Registered, Learners Pending or Learners Passed becomes In Training.
If the branch has automatic assignment switched on, the labels read Vehicle (optional) and Instructor (optional) and you may leave them on "-- Assign automatically --".
Double lessons and repeat bookings
- If the duration is a whole multiple of the lesson length (for example 120 minutes on a 60-minute package), you are asked Double lesson? Choose Yes, 2 lessons (two back-to-back lessons, two off the package) or No, one long lesson (one off the package).
- Switch on Repeat on consecutive days to book the same time on 2 to 14 days. Click Check availability, untick any day you do not want, then click Schedule Lessons. Either every selected day is booked or none is.
What is checked
flowchart TD
    A["Choose the student"] --> B{"Student status allows lessons?"}
    B -- No --> X["Refused with the reason"]
    B -- Yes --> C{"Valid learner's licence, or lesson on or after a booked learner's test?"}
    C -- No --> X
    C -- Yes --> D{"Lessons left in the package or an extra lesson?"}
    D -- No --> X
    D -- Yes --> E{"Branch open, inside working hours, on a booking slot, inside the booking window?"}
    E -- No --> X
    E -- Yes --> F{"Student, instructor and vehicle free, including the buffer?"}
    F -- No --> X
    F -- Yes --> G{"Instructor and vehicle active, at the branch, right licence code?"}
    G -- No --> X
    G -- Yes --> H["Lesson saved - status Scheduled"]
    H --> I["Student and instructor notified"]
How availability and conflicts work
- Working hours. The whole lesson must fit inside the branch's opening hours for that day. No lessons on a closed day.
- Slots. Lessons start on the branch's booking slots, counted from opening time (for example 08:00, 08:30, 09:00).
- Booking window. Not in the past, not closer than the minimum notice (default 2 hours), not further ahead than the maximum (default 60 days). These rules apply to staff as well as students.
- Buffer. If the branch has a buffer between lessons, that gap is kept before and after every lesson for the student, the instructor and the vehicle.
- Daily limit. A student may have at most the branch's maximum lessons per day (default 2). A double lesson counts as two.
- Instructor. Must be Active, at the student's branch and approved for the licence code.
- Vehicle. Must be Active, usable at the student's branch and linked to the licence code. A vehicle owned by an instructor can only be used by that instructor.
- What holds a slot. Every lesson except a cancelled one, and every student request still waiting for an answer.
Things the dialog does not tell you in advance
- The Vehicle list is not filtered by time. A busy vehicle still appears and is refused when you save.
- The available start times ignore your instructor and vehicle choice; a time can be offered and still be refused for the instructor you picked.
- Driving tests are not part of lesson availability. An instructor or vehicle booked for a driving test is still offered for a lesson at that time. Check the calendar.
- Instructor working hours and leave cannot be entered anywhere, so every Active instructor follows the branch hours. To keep an instructor from being booked, an administrator sets their status to On Leave (see chapter 13).
| Message | Cause |
|---|---|
| This student does not have a learner's licence yet. Book their learner's test first; lessons can then be scheduled from the test date. | No learner's licence and no learner's test booked. |
| Student has no remaining lessons in their training package. | Add an extra lesson or start a new course. |
| The lesson must fall entirely within branch working hours (08:00 - 17:00). | Outside opening hours. |
| Lessons must be booked at least 2 hour(s) in advance. | Inside the minimum notice. |
| This student already has the maximum of 2 lesson(s) on this day. | Daily limit reached. |
| The instructor is not available at that time. | The instructor is busy. |
| The vehicle is already assigned to another lesson at that time. | The vehicle is busy. |
| This vehicle belongs to another instructor; only its owner can use it. | Instructor-owned vehicle. |
| You can only schedule your own lessons. | You are an instructor who does not manage lessons. |
Full detail: Scheduling lessons, Availability and conflicts.
6. The calendar
Click Calendar in the left menu. It shows lessons (blue) and driving tests (green) for the school.
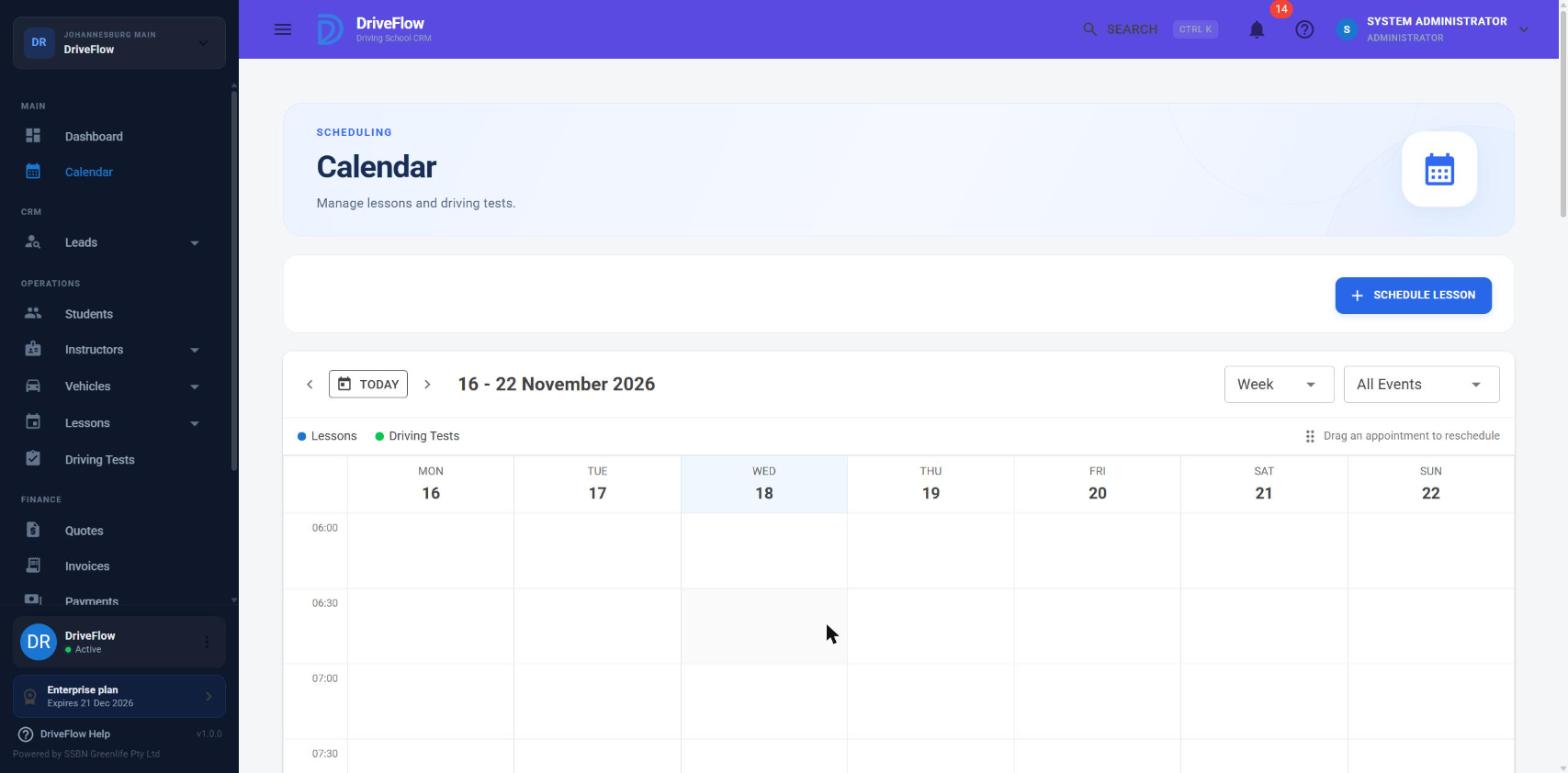
| Control | Use |
|---|---|
| < and >, Today | Move between periods. |
| Day, Week, Month | Change the view. It opens in Week. Day view has one column per instructor. |
| All Events, Lessons, Driving Tests | Show everything or one type. |
| Schedule Lesson | Opens the Schedule Lesson dialog. |
- Click a tile to see Lesson Details or Driving Test Details. These are read-only. To edit, cancel, mark attendance or sign off, use the row menu on the Lessons page or the student's Lessons tab.
- Click an empty slot to book a lesson with the date and time filled in. In Day view the instructor of the column you clicked is filled in and locked. This needs the Manage Calendar or Manage Lessons permission, so with the default roles an Instructor cannot book from the Calendar page but can from the Lessons page.
- Drag a tile to another slot to reschedule it (chapter 7).
- Tiles are coloured by type, not status: a cancelled lesson looks like a scheduled one and stays on the calendar. Open the tile to see its status.
- There are no branch, instructor, vehicle or student filters on the main calendar.
Do not drag in Month view
It moves the appointment to 00:00 of that day. Use Week or Day view.
Other calendars: the Lessons page has a List / Calendar switch (lessons only, coloured by status); each student, instructor and vehicle has its own calendar, opened from its row menu or profile. An instructor who does not manage lessons sees only their own lessons and tests.
Full detail: Lesson calendar.
7. Rescheduling and cancelling
Moving a lesson
Only Scheduled and Confirmed lessons can be moved. There are three ways.
| Method | How | Rules applied | Student and instructor told |
|---|---|---|---|
| Drag and drop | On Calendar or the Lessons page calendar view | All scheduling rules | Yes |
| Edit | Row menu on Lessons | A basic clash check only | No |
| Student change request | The student asks in the portal; staff approve under Lesson requests | All rules when requested | Yes |
Drag and drop
- Open Calendar in Week or Day view.
- Drag the lesson tile to the new slot and drop it.
- Check the Reschedule Lesson confirmation (student, current time, new time).
- Click Reschedule. You see "Lesson rescheduled successfully."
In Day view, dropping the lesson in another instructor's column hands it to that instructor. For a double lesson you are asked Move the whole lesson block? (Move all 2, Only this lesson or Back). The vehicle cannot be changed by dragging.
Edit
- On Lessons > Lessons, open the row menu and click Edit.
- Change the Lesson Date, Start Time, Duration (minutes), Vehicle, Instructor, locations or notes.
- Click Save Changes. You see "Lesson updated successfully."
Edit skips most scheduling rules
Edit checks only that the student, instructor and vehicle have no overlapping lesson and are usable at the branch. It does not check working hours, slots, the buffer, the booking window or whether the time is in the past, and it sends no notification.
Use drag and drop when you want the full rules and the messages; use Edit when you need to change the vehicle, duration or locations, and tell the student yourself.
Cancelling a lesson
Who: roles with Cancel Lessons (by default Owner, Administrator, Manager and Receptionist; not Instructor).
- Go to Lessons > Lessons, or the student's Lessons tab.
- Open the row menu and click Cancel.
- Confirm "Cancel lesson L-000123?" with Cancel Lesson. For a lesson booked with others, choose Only this lesson, The whole double lesson or This and all later lessons booked with it, then Cancel Lessons.
- You see "Lesson cancelled."
What happens:
- The status becomes Cancelled. The lesson stays in the list; it is not deleted and cannot be restored.
- The lesson goes back to the student's package automatically, however late it was cancelled. If a missed lesson should count as used, mark it No Show instead.
- The student and instructor are notified.
- No invoice, credit or refund is created.
The notice period
Each branch has a cancellation notice (default 24 hours). A Receptionist, any custom role and every student cannot cancel closer to the start than that: "This lesson can only be cancelled at least 24 hours before it starts." Owner, Administrator and Manager can always cancel late.
Warning
A cancelled lesson cannot be restored. Staff are not asked for a cancellation reason on the web. A Completed lesson cannot be cancelled.
Full detail: Lesson rescheduling, Lesson cancellation.
8. Attendance completion and sign-off
The lesson lifecycle
stateDiagram-v2
    [*] --> Scheduled: Lesson booked or request approved
    Scheduled --> Confirmed: Mark Confirmed or student confirms
    Scheduled --> InProgress: Mark In Progress
    Confirmed --> InProgress: Mark In Progress
    Confirmed --> AwaitingStudentSignOff: Instructor Sign-off
    InProgress --> AwaitingStudentSignOff: Instructor Sign-off
    AwaitingStudentSignOff --> Completed: Student Sign-off
    Confirmed --> NoShow: Mark No Show
    InProgress --> NoShow: Mark No Show
    Scheduled --> Cancelled: Cancel
    Confirmed --> Cancelled: Cancel
    InProgress --> Cancelled: Cancel
    AwaitingStudentSignOff --> Cancelled: Cancel
    NoShow --> Cancelled: Cancel
Completed --> [*]| Status | Holds the time slot | Counts against the package |
|---|---|---|
| Scheduled, Confirmed, In Progress, Awaiting Student Sign-off | Yes | Yes |
| Completed | Yes | Yes, and counts as completed |
| No Show | Yes | Yes |
| Cancelled | No | No |
In tables the status appears without spaces: InProgress, AwaitingStudentSignOff, NoShow.
Who records attendance
Permission needed
On the web, the status actions in the row menu need the Manage Lessons permission, so with the default roles only the Owner, Administrator and Manager see them. Receptionists and Instructors do not. Instructors record lessons and sign off in the mobile app.
The row menu on Lessons > Lessons offers:
| Menu item | Shown when the lesson is |
|---|---|
| Mark Confirmed | Scheduled |
| Mark In Progress | Scheduled or Confirmed |
| Instructor Sign-off | Confirmed or In Progress |
| Mark No Show | Confirmed or In Progress |
| Student Sign-off | Awaiting Student Sign-off |
| Complete | Always greyed out. It cannot be used. |
| Cancel | Anything except Completed and Cancelled |
Note
A lesson that is still Scheduled must first be marked Confirmed or In Progress before it can be signed off or marked as a no-show.
By default the branch has No status changes before the date switched on: a lesson cannot be started, signed off, completed or marked no-show before its day ("A lesson can't be started before its date ..."). Only the date is compared, so it can be done any time on the day.
Sign-off: two signatures
The instructor signs first, then the student. The order is fixed.
Instructor sign-off on the web
- Row menu > Instructor Sign-off. The Complete Lesson dialog opens.
- Check the lesson information and type anything worth recording in Lesson Notes.
- Sign in the box marked Sign here (finger, stylus or mouse). Clear starts again.
- Click Sign & Continue. You see "Instructor sign-off recorded. The lesson is now awaiting student sign-off."
Student sign-off
- The student signs themselves in the portal or the app: My lessons > the lesson's menu > Sign off lesson.
- Or on the school's device: row menu > Student Sign-off, the student signs under Your Signature, click Sign & Confirm. You see "Lesson signed off successfully."
When the student has signed:
- The lesson becomes Completed.
- The student receives a lesson completed message with lessons completed and remaining.
- If it was the last lesson of the allowance, the student's status becomes Training Completed.
- On plans with Instructor Earnings, the instructor's share is recorded.
Warning
A signed-off lesson cannot be reopened. A lesson waiting for the student's signature stays there until the student signs or staff capture the signature; there is no reminder and no time limit.
No-show
Row menu > Mark No Show > confirm. The lesson still counts as used, the time slot stays occupied, and nobody is notified.
Tip
To give the lesson back, Cancel the no-show lesson. The web menu offers no other correction for a No Show lesson.
Full detail: Lesson attendance, Lesson sign-off, Lesson history.
9. Lesson requests from students
Students can ask for a lesson, or ask to move one, from the student portal or the mobile app. A request is not a lesson until staff approve it. While it waits, it holds the instructor, the vehicle and the time.
Requirements
This works only when the school has the Online Booking feature (a paid add-on on paid plans), the Student Portal, and Allow online bookings switched on for the student's branch.
Go to Lessons > Lesson requests.
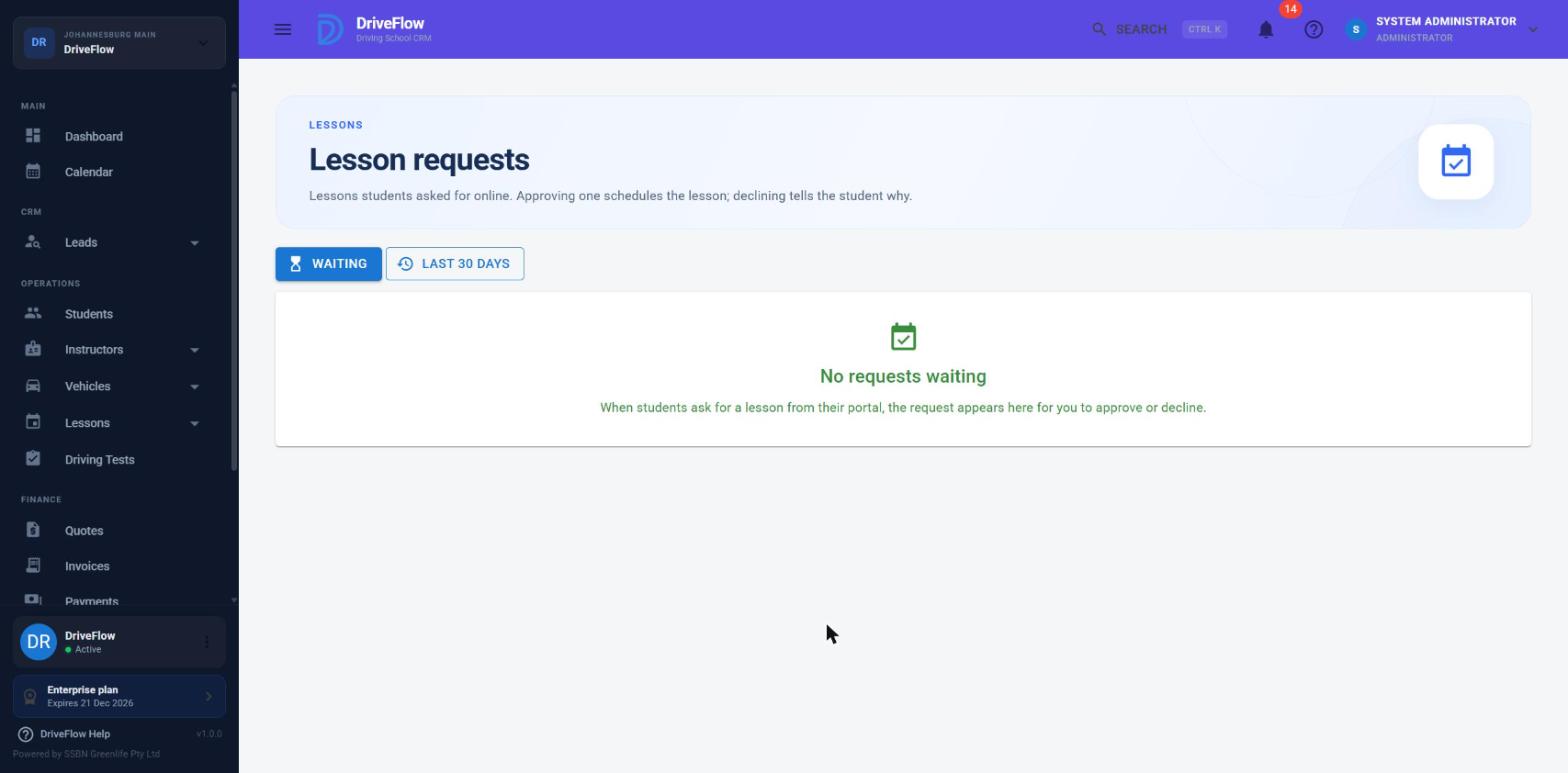
Waiting (n) lists requests still to be answered, earliest first. Last 30 days lists every recent request with its status. New requests appear without refreshing, and staff also see a pop-up and a Lesson request item in the bell. No email is sent to staff.
Approve
- Click Approve.
- Optionally type a Note to the student (optional).
- Click Approve. You see "Lesson scheduled for (student)."
A lesson is created with status Scheduled, the student gets the lesson booked message with your note, and the instructor gets the lesson assigned message.
If the student has no package lesson left, the dialog asks how to bill the extra lesson:
- Paid - raise an invoice and email it: enter the Lesson fee (pre-filled with the package's lesson price). Needs Create Invoices.
- Free (complimentary): the note becomes required. Needs Manage Lessons.
A request marked Change of lesson does not create a lesson: approving it moves the existing lesson to the requested time and sets it back to Scheduled.
Decline
- Click Decline.
- Type a Reason. It is not mandatory, but the student sees it.
- Click Decline. You see "Request declined."
Requests that are not answered
Answer requests promptly
There is no automatic expiry. A request whose time has passed disappears from Waiting and shows to the student as Expired. Until then it blocks that instructor, vehicle and student, so answer requests promptly.
Lessons created by approval have no pickup or drop-off location. Add them with Edit.
Full detail: Bookings and online requests.
10. Driving tests
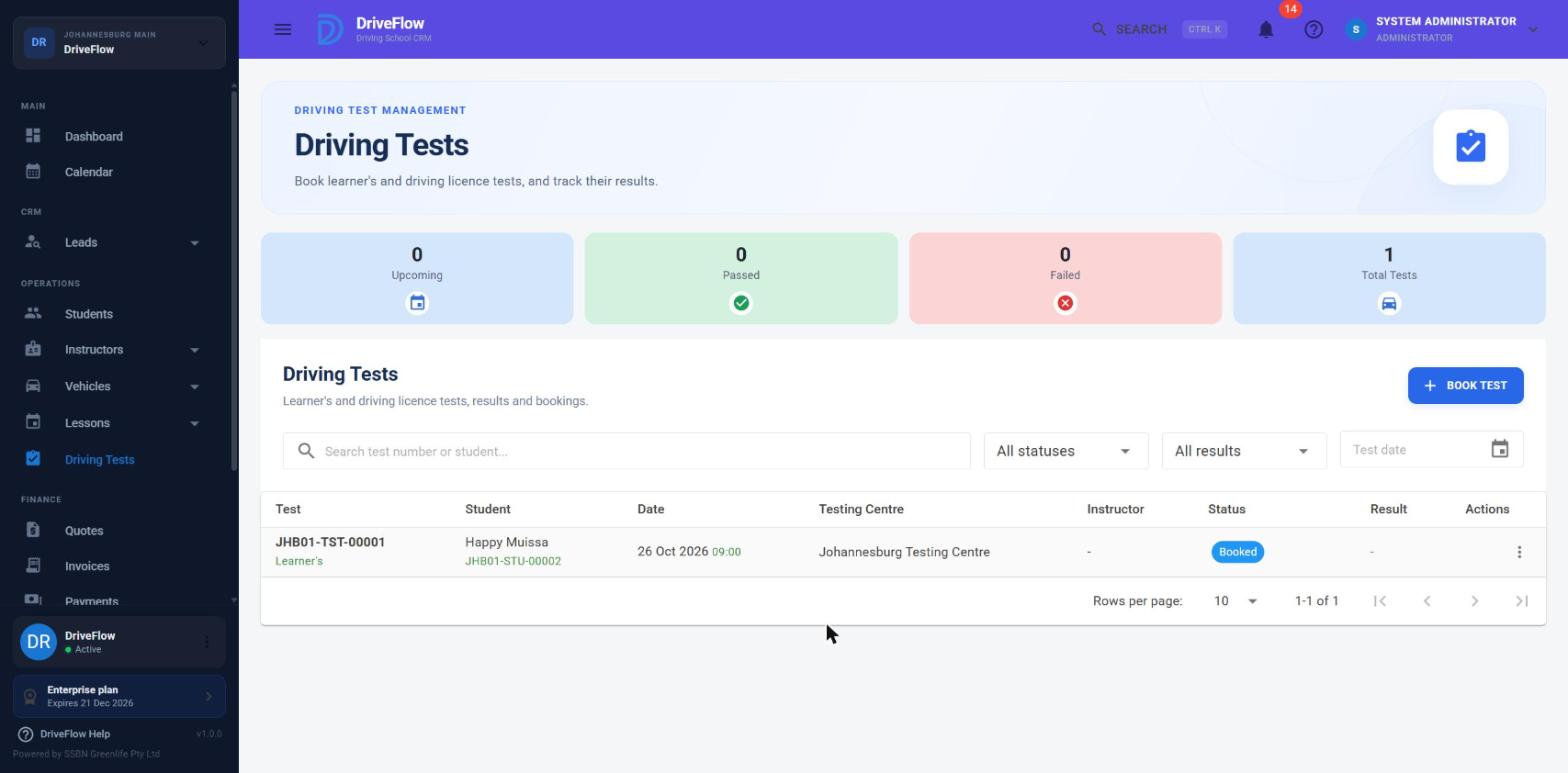
DriveFlow records two kinds of test: the Learner's Licence Test and the Driving Licence Test. The test itself is booked with the testing authority outside DriveFlow; here you record it. Booking a test creates no invoice.
Prerequisite
An administrator must first add at least one testing centre (Settings > Driving School). A new school has none.
Book a test
Who: roles with Create Driving Tests (by default Owner, Administrator, Manager, Receptionist).
- Go to Driving Tests and click Book Test. (Or use the student's Driving Tests tab.)
- Choose the Student.
- Choose the Test Type.
- Enter the Test Date and Test Time. The date starts on today but must be in the future.
- Choose the Testing Centre.
- For a driving licence test, choose the Instructor and the Vehicle.
- Optionally enter the Examiner, Booking Reference and Notes.
- Click Book Test. You see "Driving test booked successfully."
| Learner's Licence Test | Driving Licence Test | |
|---|---|---|
| Student must | Not already have a learner's licence | Have a learner's licence, and be Learners Passed, Training Completed or Test Failed |
| Status after booking | Registered or Learners Failed becomes Learners Pending | Ready For Test |
| Effect on lessons | Lessons can be booked on or after the test date | None |
A student who is still In Training cannot be booked for a driving licence test ("Student is not eligible to book a driving test."). Complete their training first. A student can have only one test booked at a time ("Student already has a scheduled driving test.").
No clash check is made when a test is booked or edited
The same instructor and vehicle can be booked for a lesson at the test time. Look at the instructor's and vehicle's day in the Calendar first and move any lessons that overlap.
No message is sent when a test is booked; the student gets a reminder before the test.
Record a result
Who: roles with Edit Driving Tests (by default including Instructor).
- On Driving Tests, open the row menu and click Record Result.
- Check the details and correct the Examiner if needed.
- Click the Passed or Failed card.
- Optionally type Result Comments.
- Click Save Result. You see "Driving test completed successfully."
Warning
By default a result cannot be recorded before the test date. A result cannot be changed once saved.
| Test | Passed | Failed |
|---|---|---|
| Learner's | The student is marked as having a learner's licence; status Learners Passed | The learner's licence tick is removed; status Learners Failed |
| Driving licence | Status Test Passed | Status Test Failed |
Note
Passing the driving licence test does not make the student Licensed: use License Student afterwards (chapter 3). After a failed driving test, add extra lessons to book more lessons.
After a failed learner's test, if the student has upcoming lessons you are asked whether to cancel them: Cancel lessons, Keep lessons or Back. Cancelled lessons go back to the package and the student and instructor are told.
Change move or cancel a test
- Edit (row menu) changes the date, time, centre, instructor, vehicle, examiner, reference and notes. The test type cannot be changed.
- Drag the green tile on the Calendar (Week or Day view) to move it. This is the only action that checks the instructor and vehicle against lessons and other tests.
- Cancel is shown only to roles with Delete Driving Tests (by default Owner and Administrator). The confirmation shows a long system code instead of the test number. Cancelling notifies nobody.
Full detail: Booking a test, Scheduling a test, Test results, Test history, Testing centres.
11. Quotes invoices payments and balances
The FINANCE section appears when the plan includes Payments. All amounts are in rand.
Quotes
Quotes need a plan that includes Quotes (not Starter). A quote never affects a balance.
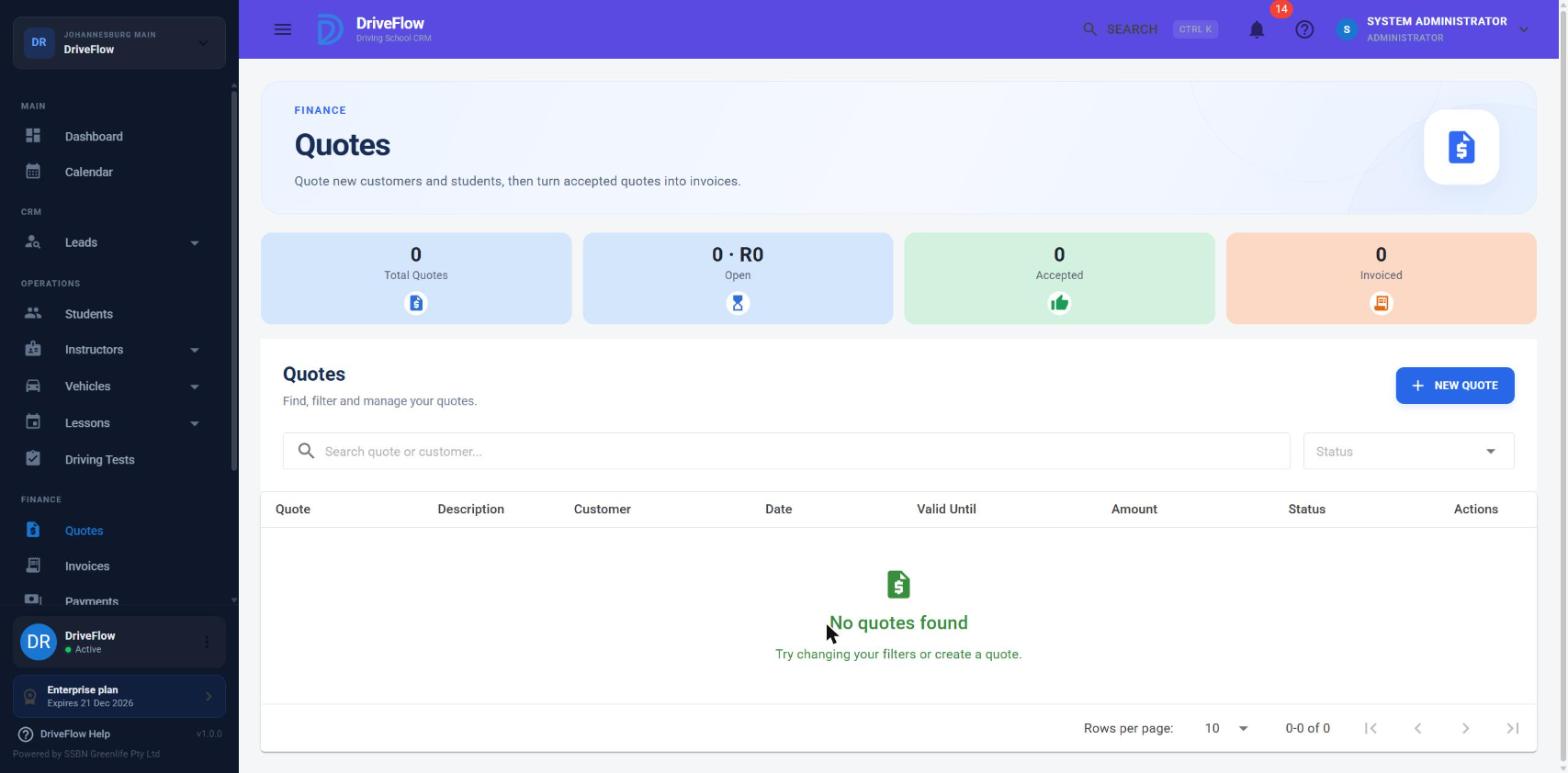
- Go to Quotes and click New Quote.
- Under Quote for, choose New customer (enter Name, Email, Phone) or Existing student.
- Optionally switch on Bill to a company.
- Set the Quote Date and Valid Until (defaults to 30 days).
- Fill in the Lines: optionally a Training package, then Description, Qty, Unit Price and Discount.
- Optionally enter Notes and Tax (a typed rand amount).
- Click Create Quote. The quote is a Draft.
From the row menu: Email to Customer (a draft becomes Sent), Download PDF, Mark as Sent, Accept, Reject, Edit, Delete Draft.
To turn an Accepted quote into an invoice: row menu > Convert to Invoice > choose Student invoice (pick the student) or Walk-in invoice (no student) > set the Due Date > Create Invoice.
Avoid billing twice
Converting does not create the student. For a new customer who becomes a student, register the student first, and remember that registration raises its own invoice for the package: check the student is not billed twice.
Invoices
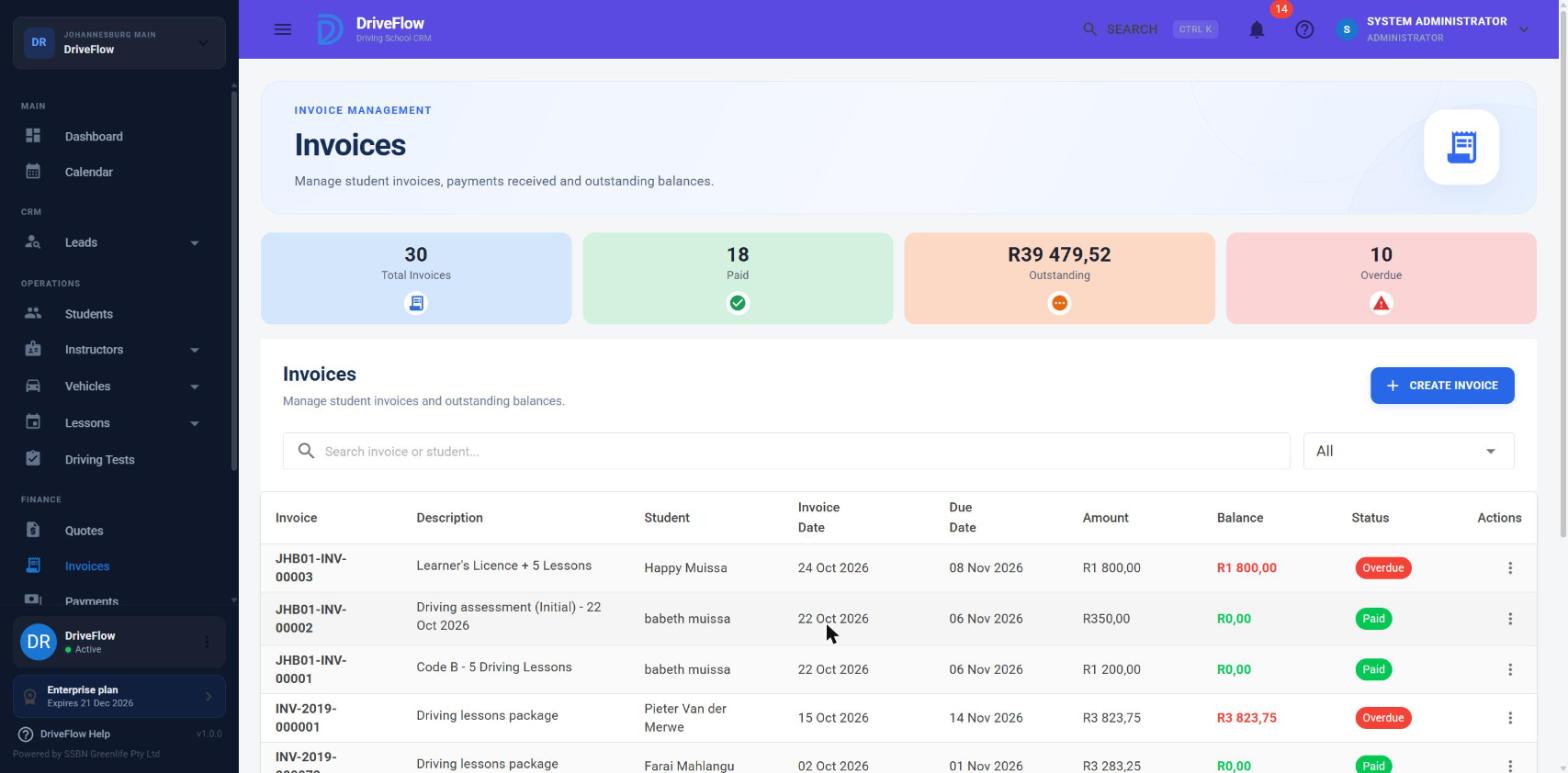
Most invoices are created for you: at registration, when a course is started, for a paid extra lesson, for an assessment with a fee, and when a quote is converted. To create one by hand:
- Go to Invoices and click Create Invoice.
- Choose the Student. Optionally fill in Bill to company (optional).
- Set the Invoice Date and Due Date (defaults to 15 days).
- Under Invoice Items, fill in Description, Qty, Unit Price and Discount. Use Add Item for more lines.
- Enter Tax if it applies, and optional Notes.
- Click Create Invoice.
A manual invoice is not emailed automatically. From the row menu: View, Download PDF, Send Email, Send Reminder, Edit, Record Payment, View Payments, Cancel Invoice.
| Status | Meaning |
|---|---|
| Pending | Issued, nothing paid. |
| PartiallyPaid | Some money received. |
| Paid | Fully paid. |
| Overdue | Unpaid past the due date plus the school's grace period. Set by a daily job. |
| Cancelled | Withdrawn. Only possible while nothing has been paid on it. |
Tax
Tax is a typed amount. DriveFlow does not calculate VAT, and automatically created invoices carry no tax. See VAT and numbering.
Payments
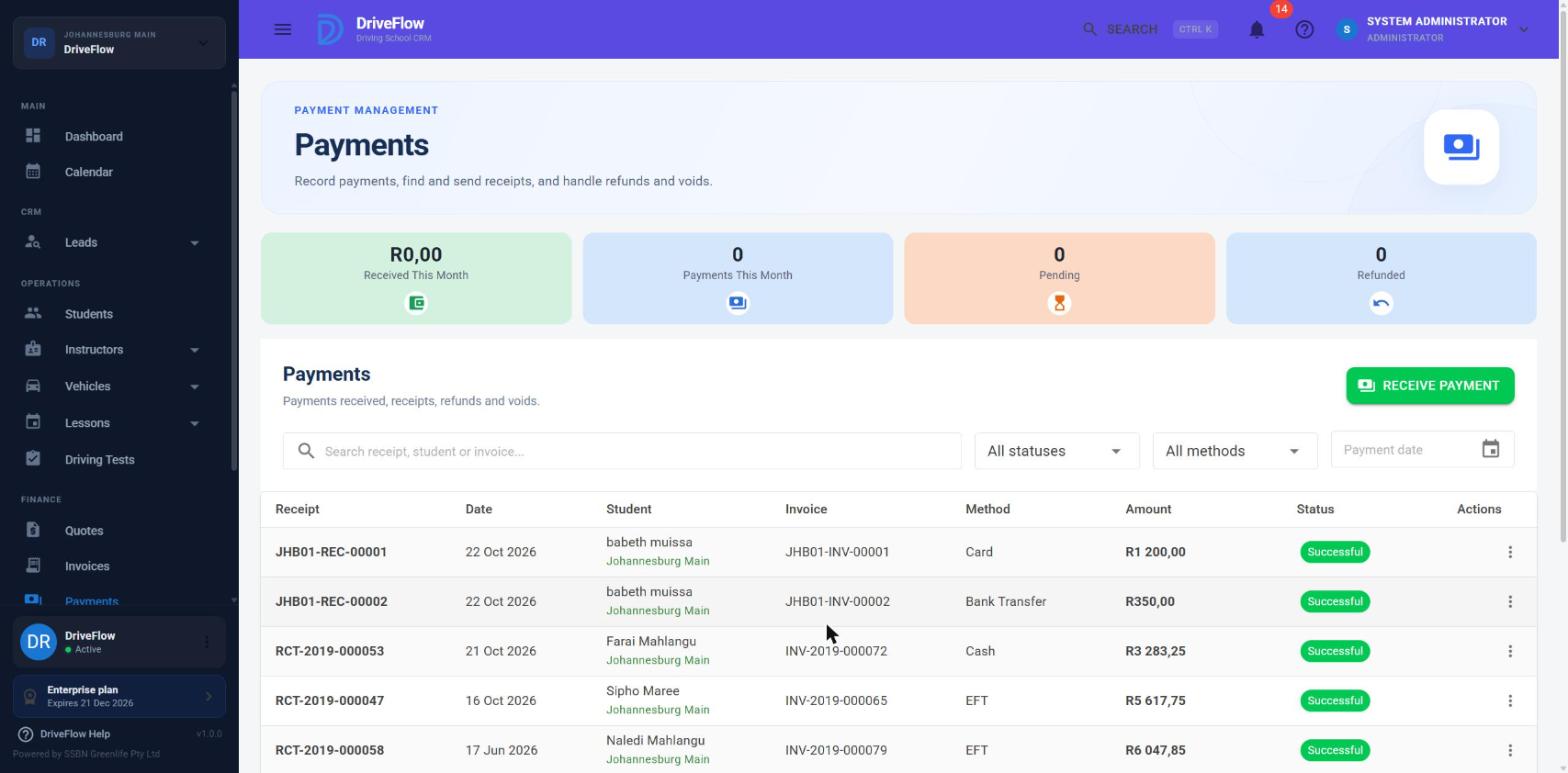
- Go to Payments and click Receive Payment. (Or use Record Payment on an invoice, the dashboard or the student's profile.)
- Pick the student.
- Choose the Invoice. The first outstanding invoice is pre-selected.
- Check the Amount. It is pre-filled with the outstanding balance; lower it for a part payment.
- Choose the Payment Method: Cash, Card, EFT, BankTransfer or MobilePayment. The method is a label only; nothing is charged.
- Set the Payment Date and optionally a Reference Number and Notes.
- Click Receive Payment. You see "Payment received."
The payment gets a receipt number, the invoice becomes Paid or PartiallyPaid, and the student is sent the payment received message with the receipt.
Rules
- Every payment belongs to one invoice. There is no deposit or account credit: create the invoice first.
- A payment cannot be more than the invoice balance ("Payment cannot exceed the outstanding invoice balance.").
- Payments cannot be recorded for an Inactive or Licensed student ("Student is not active.").
- A payment cannot be edited. Void it and record it again.
From the row menu on a payment: View Details, Download Receipt, Email Receipt, Refund, Void.
- Void: for a payment captured in error.
- Refund: after you have given the money back outside DriveFlow. DriveFlow does not send money anywhere. The whole payment is refunded; there are no partial refunds and no credit notes.
- For a payment that came in online through PayFast, refund it in PayFast and then use Void in DriveFlow.
A receptionist's view. A user who can record payments but not view them sees only the payments they recorded themselves, on the Payments page, the dashboard ("My Payments Today") and the student's Payments tab ("Paid (recorded by you)").
What a student owes
A student has no account balance of their own: what they owe is the total of the balances of their unpaid invoices.
- Go to Invoices.
- Type the student's name or number in Search invoice or student...
- Read the Balance column. Red amounts are still owed.
To see everything overdue: set Status to Overdue and sort by Due Date. Use Send Reminder or Record Payment from each row.
Outstanding figures differ between screens
Outstanding figures on different screens are calculated differently. The Outstanding card on a student's Payments tab also counts cancelled invoices, so rely on the invoice list. There is no statement of account, no aged-debtors report and no write-off.
Full detail: Quotes, Invoicing, Payments, Payment history, Outstanding balances, Refunds and voids.
12. Leads and follow-ups
A lead is someone who has enquired but is not yet a student.
Plan requirement
Leads is included in the Free Trial, and on Professional and Enterprise plans needs the paid Leads add-on. It is not available on Starter. When it is not active, the Leads group is not in the menu.
Capture a lead
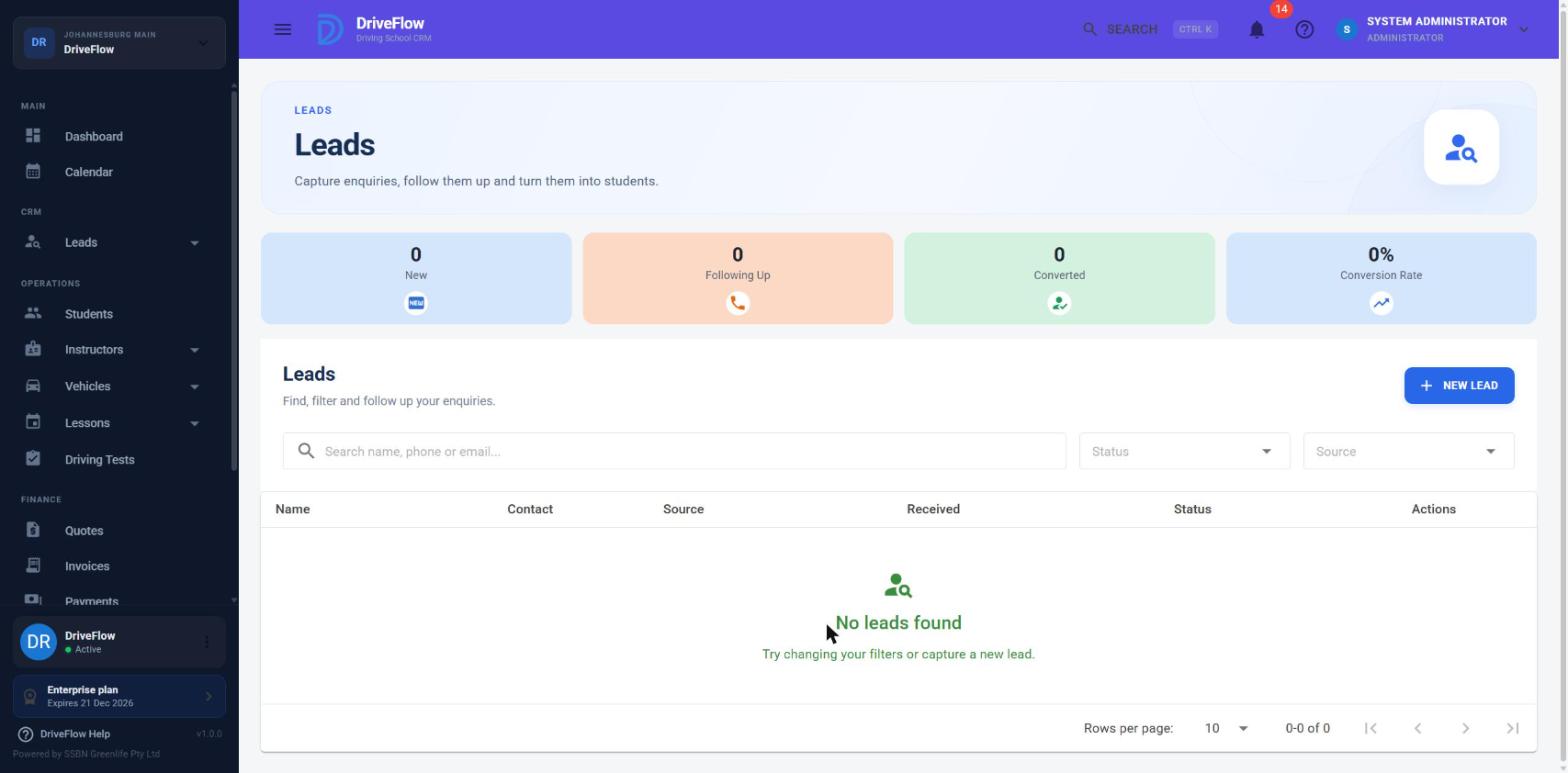
- Go to Leads > All Leads and click New Lead.
- Enter First Name and Last Name, and a Phone Number or an Email (at least one).
- Choose the Source (Manual, Facebook, Instagram, Website, WhatsApp, Phone, Walk-in, Referral). It is a label only.
- Optionally choose a Branch and type Notes.
- Click Create Lead. The lead starts as New.
Duplicates are not checked. Creating a lead by hand does not create a follow-up.
Work a lead
From the lead's ⋮ menu: View, Edit, Schedule Follow-up, Mark as New / Contacted / Qualified / Lost, Register as Student, Link Existing Student, Delete.
A lead has no owner. To hand a lead to a colleague, schedule a follow-up assigned to them.
Follow-ups
- On the lead, choose Schedule Follow-up (or click New Follow-up on Leads > Follow-ups).
- Set the Date, Time, How (Call, WhatsApp, Email, Meeting, Other), Assigned to and What to do.
- Click Schedule.
On Leads > Follow-ups the cards Overdue, Due Today, Upcoming and Done This Week filter the list, and Mine only shows your own. The phone and WhatsApp icons open your own phone or WhatsApp; DriveFlow does not call or send anything.
To finish one: click the tick (Complete), fill in What happened?, set the Lead status, optionally switch on Book the next follow-up, and click Complete.
Note
The only reminder is the bell in the header, which shows follow-ups due by the end of today that are assigned to you or to Anyone. No email is sent.
Convert a lead
- Register as Student opens the Register Student page with the lead's details filled in. When the student is saved, the lead becomes Converted.
- Link Existing Student marks the lead converted against a student who already exists.
Converted is final. There is no "convert lead to quote".
Leads from Facebook and Instagram
When an administrator has connected the school's Facebook Page, people who fill in your lead ads appear in All Leads within seconds with the source Facebook or Instagram, and a Call follow-up due in 30 minutes assigned to Anyone. Advert leads have no branch. See the Administrator Guide for connecting the Page.
Leads > Campaigns shows "Coming soon" and has no functions.
Full detail: Leads, Follow-ups, Meta lead capture.
13. Instructors and vehicles day to day
Permissions
Adding, editing and deleting instructors and vehicles needs permissions that only the Owner and Administrator have by default. Everyone else can view.
Instructors
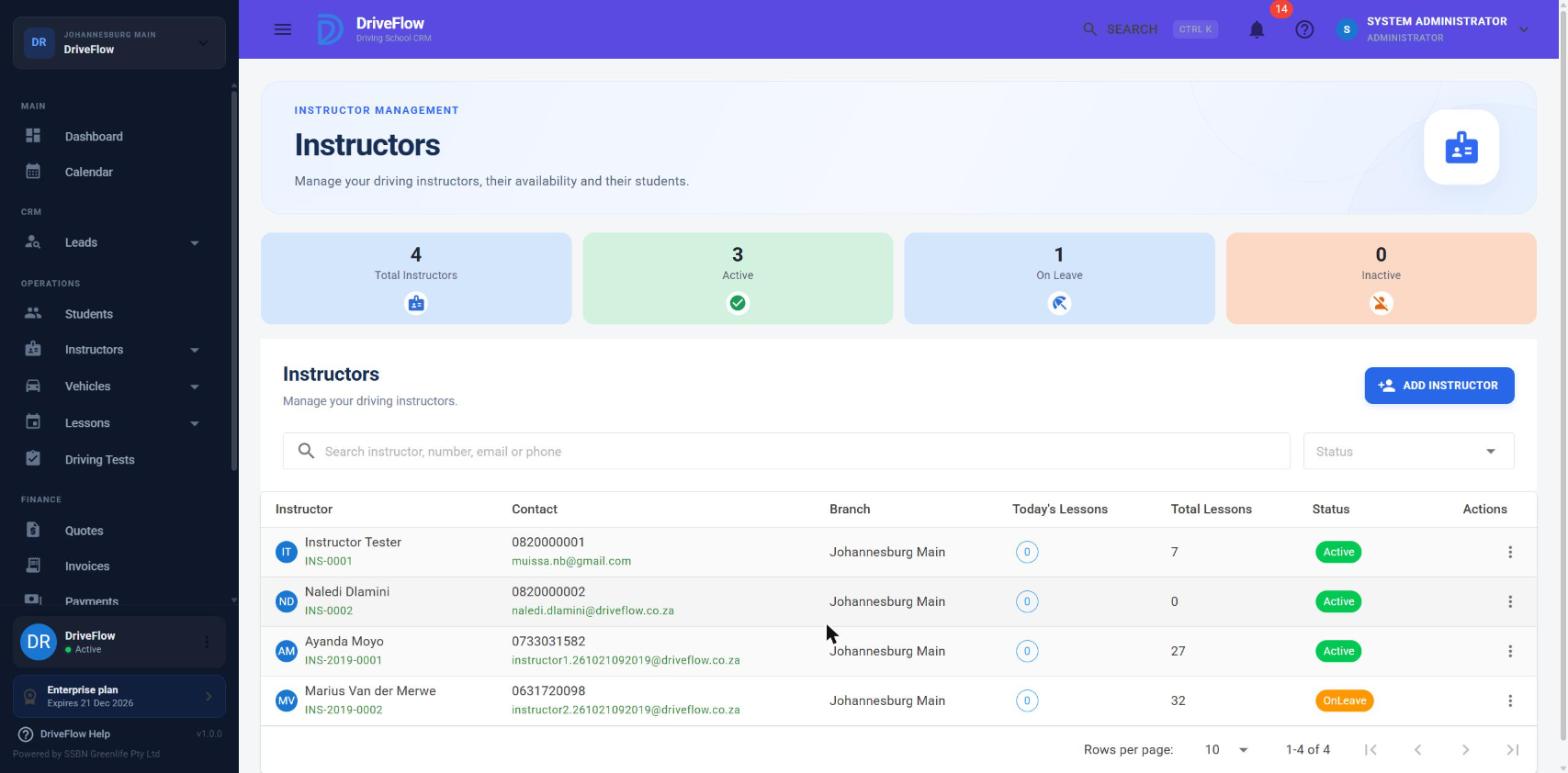
Open Instructors > Instructors. The row menu offers View, Calendar, Edit, Sign-in account, Activate / Deactivate and Delete.
Add an instructor
- Click Add Instructor.
- Choose the Branch; enter First Name, Last Name, Identity Number (enter the full 13 characters), Employment Date, Birth Date, Email and Phone Number.
- Under Licence Codes, click the circle for each code the instructor may teach.
- Click Save Instructor.
Warning
Change the Birth Date: it opens on today's date, and an instructor saved with today's date cannot be edited until a real date is entered.
| Status | Can be booked for new lessons |
|---|---|
| Active | Yes |
| On Leave, Suspended (set from Edit > Status) | No |
| Inactive (Deactivate) | No |
When an instructor is away. There is no leave calendar and no blocked time.
- Set the instructor's status to On Leave.
- Open their Calendar and move or cancel the lessons already booked: changing the status does not do that for you.
- Set the status back to Active when they return.
Note
While On Leave the instructor cannot be booked for any date, including dates after their return, so book those first or switch them back to Active to book.
A status change does not switch off the instructor's sign-in. To stop someone signing in, an administrator disables their user.
Instructors > Reviews shows how students rated their lessons. Only the Owner sees which student gave a rating.
Vehicles
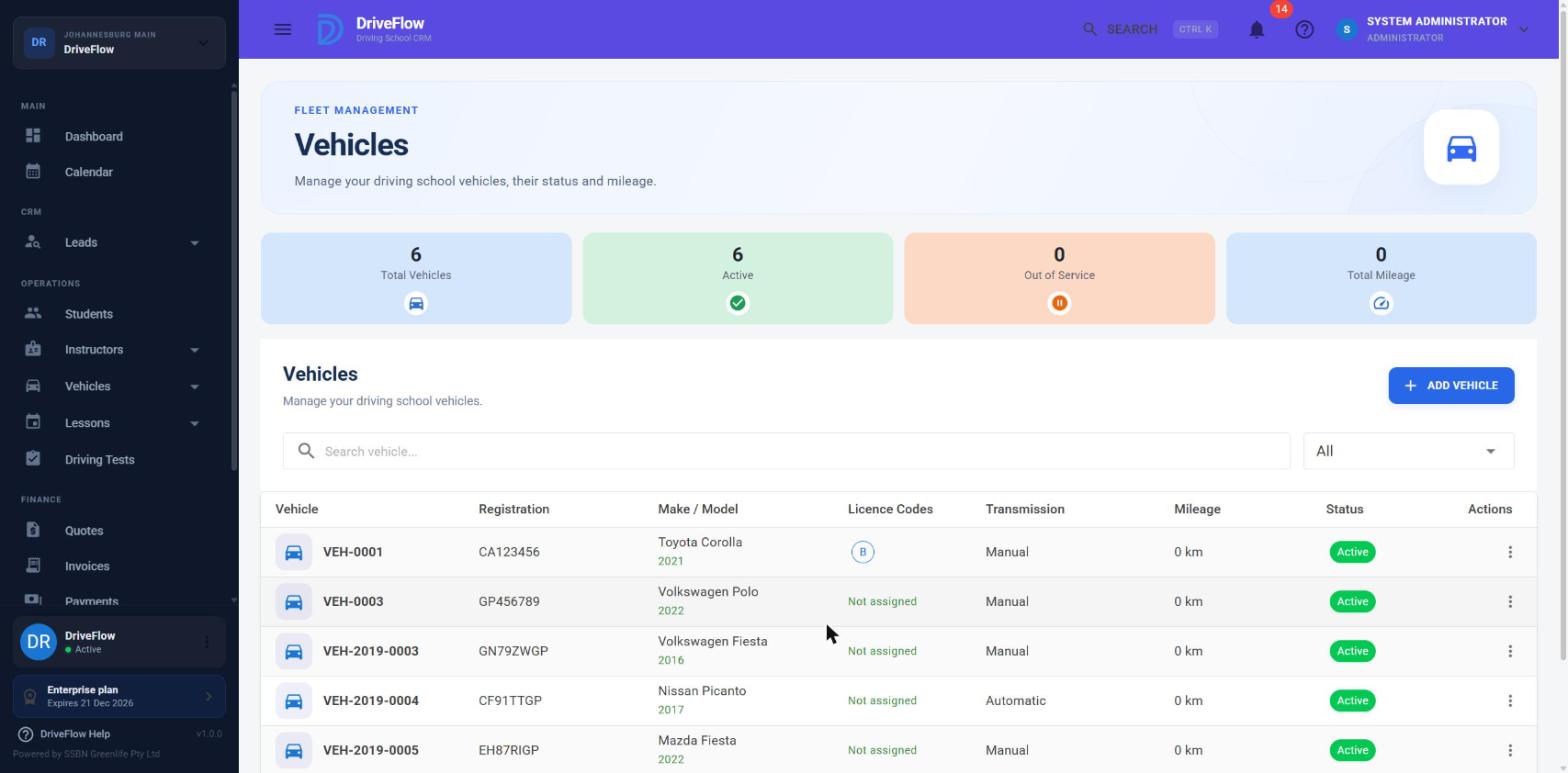
Open Vehicles. The row menu offers View, Edit, Calendar, Kilometres & costs (with Fleet Management), Set Out of Service / Activate and Delete Vehicle.
Add a vehicle
- Click Add Vehicle.
- Enter the Registration Number, Make, Model, Year (it starts at 0, so type it), Transmission, Fuel Type, Branch and Current Mileage.
- Choose Vehicle Ownership: School Owned or Instructor Owned (then choose the Vehicle Owner). Optionally choose the Current Instructor.
- Optionally enter Insurance Expiry, Roadworthy Expiry, Licence Disc Expiry, Next Service Date and Next Service Mileage. Each one you fill in switches on a reminder in the bell.
- Under Licence Codes, tick at least one.
- Click Save Vehicle.
An instructor-owned vehicle can only be used for lessons taught by its owner.
When a vehicle is off the road
- Row menu > Set Out of Service (or Edit > Status > Maintenance). The vehicle is no longer offered for new lessons.
- Open the vehicle's Calendar and note each lesson and test during the absence.
- Edit each lesson to another vehicle, or reschedule or cancel it. Existing bookings are not moved for you, and saving an edit that keeps a non-Active vehicle is refused with "Vehicle is not active."
- When it is back, row menu > Activate.
Expiry reminders
The bell warns 30 days before a licence disc, roadworthy certificate or insurance expires, and when a service is due within 14 days or 500 km. These reminders are in the bell only and do not stop the vehicle being booked. When a document is renewed, edit the vehicle and enter the new date.
Full detail: Registering an instructor, Instructor profiles, Instructor availability, Registering a vehicle, Vehicle information, Vehicle availability, Vehicle maintenance.
14. Fleet and instructor earnings
Plan requirement
Both features are part of the Enterprise plans (Enterprise, Enterprise Plus, Enterprise Custom) and the Free Trial. They are not in Starter or Professional. Without them the menu items are hidden.
Fleet Management
Open Vehicles > Fleet Management.
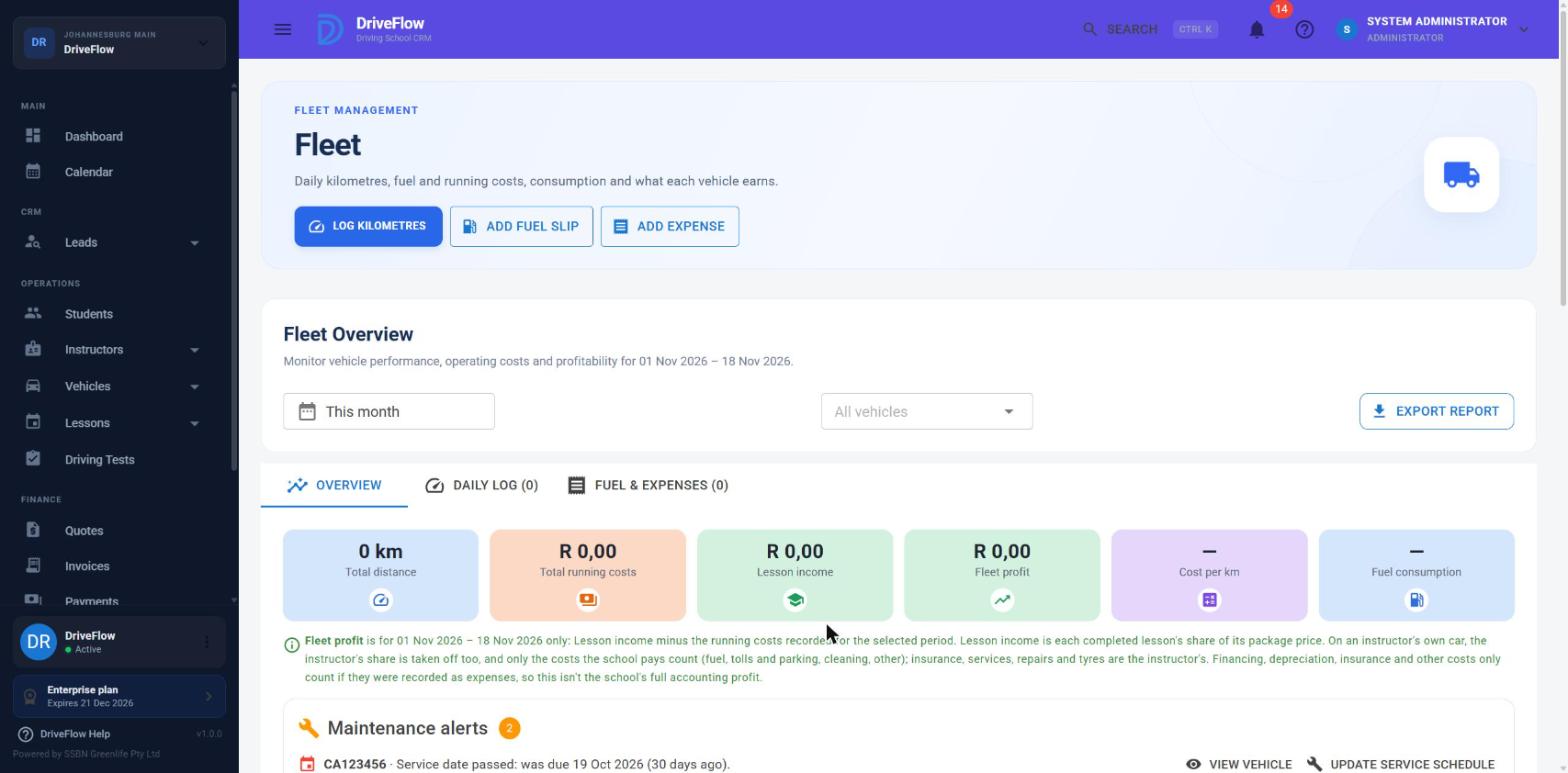
Log daily kilometres (one log per vehicle per day)
- Click Log kilometres.
- Choose the Vehicle and Date.
- Check the Opening odometer (pre-filled with the last closing reading) and enter the Closing odometer.
- Click Save log. You see "Kilometres logged."
A yellow box, Daily logs needing attention, lists days in the past week on which a vehicle had lessons but no log, each with a Log now button.
Record fuel and expenses
- Click Add fuel slip or Add expense.
- Choose the Vehicle, Date and Category (Fuel, Service, Repair, Tyres, Licence & insurance, Tolls & parking, Cleaning, Other).
- Enter the Amount paid. For fuel also enter Litres and the Odometer at the pump, and untick Filled the tank for a part fill.
- Optionally click Add receipt (a photo or PDF up to 10 MB).
- Click Save expense.
An instructor without wider fleet permissions sees and records only for the vehicle assigned to them or owned by them. You can change only logs and expenses you recorded yourself, unless you have the Manage Fleet permission.
The Overview tab (View Fleet permission) shows total distance, running costs, lesson income, fleet profit, cost per km, fuel consumption, maintenance alerts and a row per vehicle. Fleet profit is an estimate based on package prices, not money received.
Instructor Earnings
Open Instructors > Earnings.
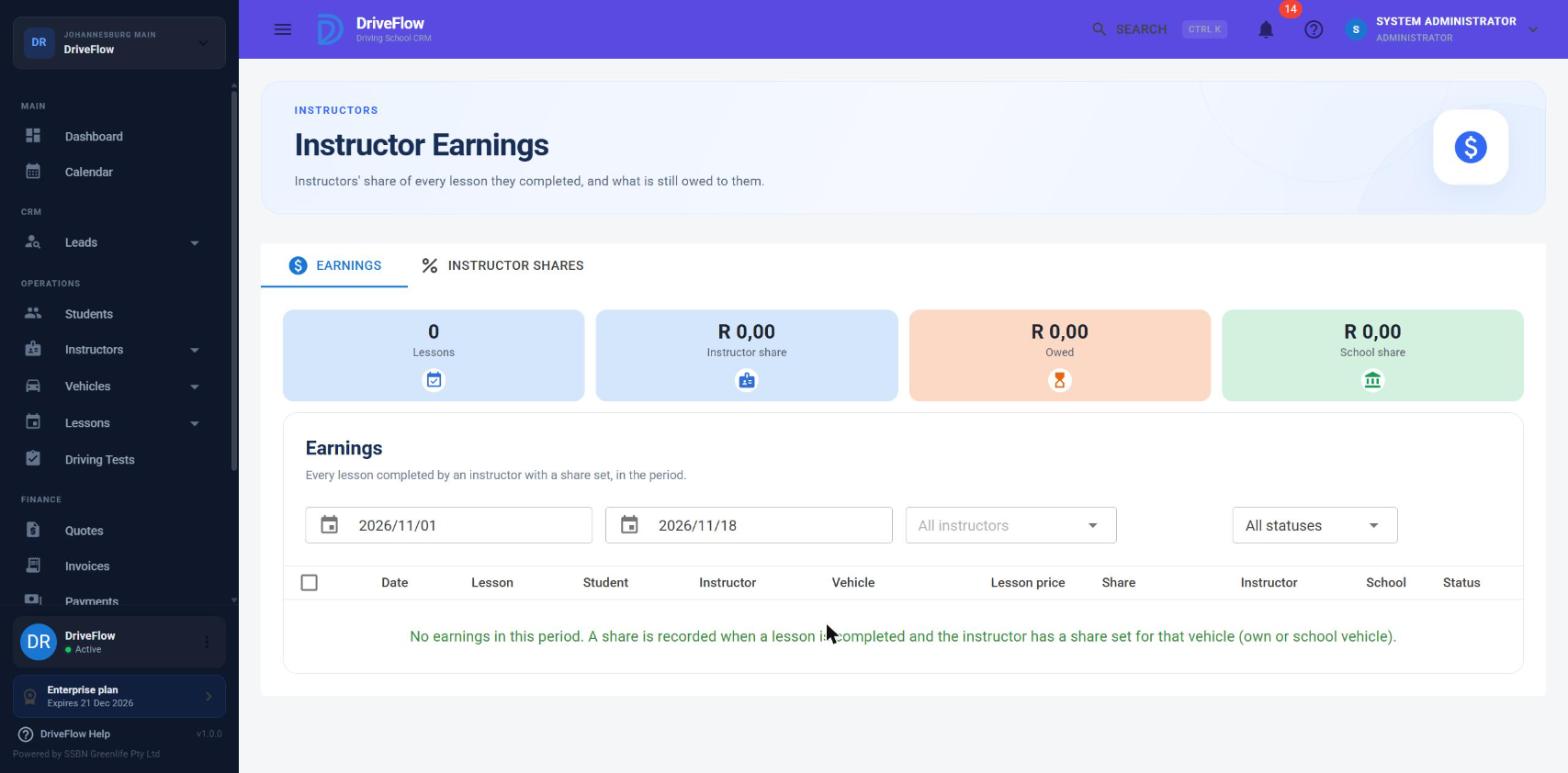
For every lesson that is completed, DriveFlow records how much of the lesson price goes to the instructor, based on the share set for that instructor (one share for lessons in their own vehicle, one for lessons in a school vehicle).
DriveFlow does not pay anybody
You pay the instructor outside DriveFlow and then mark the earnings as paid.
To mark earnings as paid (needs the Manage Instructor Earnings permission):
- Set From / To, choose the instructor and set the status filter to Owed.
- Tick the rows you are paying. The toolbar shows the total.
- Pay the instructor by your usual method.
- Click Mark as paid.
An instructor with the View Own Earnings permission sees the page as My Earnings, with their own rows only.
Note
Nothing is recorded for cancelled lessons or no-shows, or when the instructor has no share set for that kind of vehicle. Earnings are never recalculated, and there are no manual adjustments.
Full detail: Fleet management, Instructor earnings.
15. Reports and dashboard
Dashboard
The Dashboard shows cards for Students, Lessons Today, Tests Today, Payments Today, This Month, This Year and Outstanding, plus Upcoming Lessons, Upcoming Driving Tests, Payments Overview, Recent Payments and Quick Actions (Add Student, Schedule Lesson, Record Payment, Book Driving Test). Each part appears only with the matching permission. Click Refresh dashboard to reload; the page does not refresh itself.
- "Payments" always means money received, by payment date.
- Instructors who do not manage lessons see only their own lessons and tests.
- Users tied to one branch see only that branch.
- There is no date or branch filter.
Reports
Permission and plan
The Reports group needs the View Reports permission (by default Owner, Administrator, Manager, Finance and Viewer) and a plan that includes Reports.
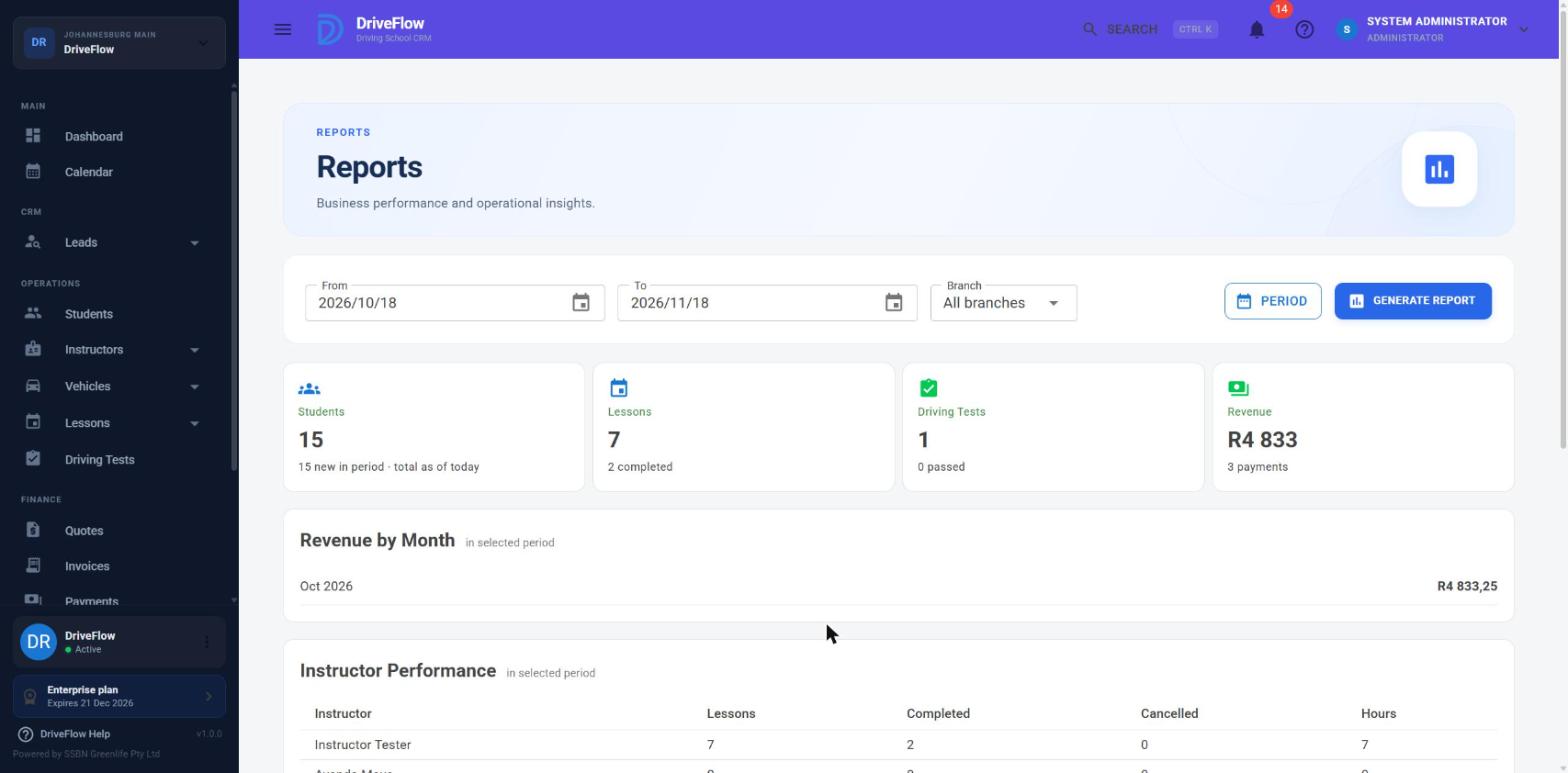
| Report | Shows |
|---|---|
| Overview | Students, lessons, driving tests and revenue for a period. |
| Student Report | Student numbers and progress. |
| Lesson Report | Lessons by instructor, licence code and day. |
| Sign-Off Report | Lesson sign-offs with both signatures. |
| Driving Test Report | Tests by licence code, instructor, centre and day. |
| Financial Report | Money received, outstanding, overdue, student balances, payment transactions. |
| Vehicle Report | Vehicle use and document compliance. |
| Instructor Earnings Report | Earnings per instructor (Enterprise). |
To run one:
- Set From and To (or pick a Period).
- Optionally choose a Branch.
- Click Generate Report.
- To save it, click Export and choose Excel, PDF or CSV.
Note
The exported file contains only the report's detail table, with every row, and no totals row, school name or period line.
The pass and fail figures on the Driving Test Report count tests by their recorded result (Passed or Failed), the same way as the Passed and Failed cards on the Driving Tests page; the pass rate leaves out tests that have no result yet (see Test history and Operational reports).
Full detail: Dashboard, Operational reports, Financial Report, Exporting reports.
16. Notifications students and staff receive
Email is the main channel. SMS and WhatsApp are optional extras that the school switches on (see the Administrator Guide). Push messages go to the mobile app when the plan includes it.
Messages to students
| When | Message | Notes |
|---|---|---|
| Student registered | Welcome | Not sent if registration happens during the school's quiet hours. |
| Student registered, paid extra lesson, assessment with a fee, quote converted | Invoice with PDF | Email only. |
| Lesson booked, or a lesson request approved | Driving Lesson Confirmed | |
| Before a lesson (default 24 hours) | Driving Lesson Reminder | One per lesson. Only for lessons still in Scheduled status: a lesson already Confirmed gets no reminder. |
| Lesson moved by drag and drop, or a change request approved | Driving Lesson Rescheduled | Not sent when a lesson is changed with Edit. |
| Lesson cancelled | Driving Lesson Cancelled | |
| Lesson or change request declined | Lesson Request Declined, with your reason | |
| Student signs off a lesson | Driving Lesson Completed | Email and push only. |
| Before a driving test (default 24 hours) | Driving Test Reminder | |
| Payment recorded or confirmed online | Payment Received, with receipt | |
| Invoice due soon or overdue | Payment reminder with the invoice attached | Sent by the daily run, per invoice. |
Booking, reschedule and cancellation messages show the lesson number, date, time and pickup location, but not the instructor's name or the vehicle. Only the reminder includes those.
Messages to staff
Only instructors receive messages: New Lesson Assigned, Lesson Rescheduled and Lesson Cancelled, by email and push. Owners, administrators and receptionists are not emailed about anything.
What sends nothing
Note
No message is sent for: a no-show; the instructor's sign-off; a student sending a lesson request (staff see it in the bell); a driving test being booked, changed, cancelled, passed or failed; a refund or void; lead follow-ups; vehicle expiry dates. Guardians never receive messages.
The bell
The bell in the header is a live list of work needing attention, not a message inbox. Nothing is marked as read; an item disappears when the work is done.
| Item | Meaning |
|---|---|
| Lesson request | A student's request waiting for approval. |
| Follow-up today / Overdue follow-up | A lead follow-up due by the end of today. |
| Lesson / Pickup | Lessons today and tomorrow. |
| Driving test | Tests today, tomorrow or the day after. |
| Overdue invoice | An unpaid invoice past its due date. |
| Extra lesson to schedule | A student has extra lessons that are not booked yet. |
| Vehicle items | Licence disc, roadworthy, insurance or service due. |
| Fleet items | Fleet Management alerts (Enterprise). |
Full detail: Notification triggers, Lesson reminders, In-app notifications, and the Notification Reference.
17. The student portal and the mobile app in brief
Student portal
The student portal is the student's own part of the web application. It is part of the Professional and Enterprise plans and the trial. Students cannot register themselves: staff invite them.
Invite a student (needs Edit Students):
- Open Students and click the student.
- On the Overview tab, find the row Student portal and click Invite to portal.
- Click Send invite. You see "Portal invite sent to (email)." and the chip changes to Invited.
The student receives an email with their username (their email address) and a temporary password, and must choose their own password at first sign-in. Use Resend invite if they lose it. Activating and deactivating a portal sign-in is done under Settings > Security.
Warning
If you change a student's email address, the old sign-in no longer finds the student: invite the student again on the new address.
What a student can do in the portal:
| Menu | Use |
|---|---|
| Overview | Next lesson, training progress, payments, next driving test. |
| My lessons | Upcoming lessons and open requests. Per lesson: Confirm I'll be there, Sign off lesson, Ask to change the time, Add to calendar, Cancel lesson. |
| My requests | Every lesson and change they asked for, with the school's answer. |
| Book a lesson | Pick a free time and send a request (only when online booking is available). |
| Rate your lessons | 1 to 5 stars per completed lesson, within 90 days. A rating cannot be changed. |
| Invoices | Invoices and payments, and Make payment through PayFast when the school has set it up. |
| Messages | A read-only list of the emails, SMS and WhatsApp messages the school sent. |
Students are held to the branch's cancellation notice when cancelling or asking to change a lesson. The portal has no documents page, no profile page and no way to send a message to the school.
Full detail: Student portal.
Mobile app
DriveFlow Mobile is one Android app with three sets of screens, chosen by your role. You sign in with the same email and password as on the web.
| Role | Screens |
|---|---|
| Student | Dashboard, lessons, requests, sign-off, ratings, invoices and payments, messages, plus lesson reminders on the phone. |
| Instructor only | Own lessons by day, lesson details, Start lesson, Complete and sign off (instructor then student signs on one device), own students, kilometre log. |
| Owner and other staff | Dashboard, schedule, free times and booking, students, instructors, vehicles, invoices and payments, reports, some settings. |
Requirements and limits
- The app needs a plan that includes the Mobile App: Professional and higher. It does not work on the Free Trial or Starter. Staff and students of a school without it are refused; the owner sees an upgrade screen.
- Android only. There is no iPhone version.
- It needs an internet connection for every screen.
- In the instructor app a lesson must be In progress before it can be signed off; instructors cannot mark a no-show, cancel or reschedule from the app.
- Staff cannot approve or decline lesson requests in the app; do that on the web.
Full detail: Mobile app overview, Instructor features, Student features, Owner and staff features, Web vs mobile.
18. Known limitations
These are the things staff run into most often. Each is explained in the chapter shown.
Students
- Registration is one page; the numbered strip at the top does nothing. (Chapter 2)
- The identity number must be exactly 13 characters for every country; a passport number cannot be saved. (2)
- Student search does not match phone numbers or a full "first last" name. (3)
- Editing a student does not save the address or the guardian details, and cannot change the branch, package or instructor. (3)
- Editing a student with a valid learner's licence resets the status to Learners Passed. (3)
- Guardian and emergency contact details are not shown on the profile, and guardians never receive messages. (3)
- Note Edit creates a duplicate and note Delete does nothing. (3)
- Proof of Payment document uploads appear to fail; use Other. (3)
- Licensing a student cannot be undone and does not complete the course. (3)
- A deleted student cannot be restored and their identity number and email stay reserved. (3)
Lessons
- "Remaining" means lessons left to book on the Overview but lessons not yet completed on the Lessons tab. (4)
- A no-show uses a lesson and blocks automatic training completion. (4, 8)
- The vehicle list when booking is not filtered by time. (5)
- Lessons and driving tests are not checked against each other when booking. (5, 10)
- Instructor working hours and leave cannot be entered; use the On Leave status. (5, 13)
- Edit on a lesson skips most scheduling rules and sends no notification. (7)
- Month view dragging moves an appointment to midnight. (6)
- Staff cannot enter a cancellation reason, and a cancelled lesson cannot be restored. (7)
- The Complete menu item is always greyed out; lessons are completed by the two signatures. (8)
- Receptionists and instructors do not see the attendance actions on the web with the default roles. (8)
- A lesson reminder is not sent for a lesson that was already Confirmed. (16)
- The Pickup Location and Drop-Off Location columns in the Lessons table are empty; open View to see them. (See Lesson history.)
- The Lessons status filter offers only All, Scheduled, Completed, Cancelled and No Show.
Driving tests
- A test result cannot be corrected. (10)
- Only Owner and Administrator can cancel a test with the default roles. (10)
- No message is sent when a test is booked, changed or cancelled. (10)
Money
- No VAT calculation; tax is typed by hand and automatic invoices have none. (11)
- No deposits, account credit, payment plans, credit notes, partial refunds or statements of account. (11)
- A payment cannot be edited; void and re-enter. (11)
- An invoice with payments cannot be cancelled until the payments are voided or refunded. (11)
- Starting a new course does not email the invoice. (4)
- The Payments search box does not search by invoice number.
Other
- There is no branch switcher. (1)
- Leads has no owner field, no duplicate check and no email reminders; Campaigns is "Coming soon". (12)
- The mobile app is Android only and needs Professional or higher. (17)
- The student portal has no documents, no profile page and no messaging to the school. (17)